Cells, instances and arrays
Every mask layout repeats something: an alignment cross in four corners, a test structure stepped across a die, a ring of identical features. You could copy and paste the geometry, but then a change means editing every copy. Instead you draw it once, inside a cell, and place instances of that cell wherever you need it. Change the cell, and every instance changes with it.
This guide builds that from nothing: a new cell, geometry inside it, one instance, a 3×3 array, a ring of eight, and the two tools you use to keep a hierarchical layout readable. No prior layout-editor experience assumed.
- Time: ~15 min
- You'll need: Glyph open on a blank document. Nothing to download, no file to load.
One orientation note before you start: the tabbed panel with Layers / Cells / Objects / Results sits on the right-hand side of the window, underneath Properties. You can drag its inner edge to make it wider if you want more room — the screenshots below use the default width.
Make a cell. Click the Cells tab, then the + button in its header. Type
CROSSand press Enter. A new row appears belowTOP.TOPis the cell your document starts in — the one that gets written out as the top of the GDS file;CROSSis empty for now and, because nothing uses it yet, it sits at the same level asTOP.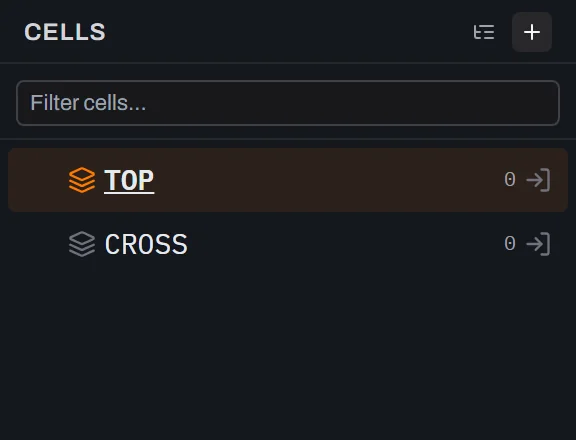
Draw inside it. Click the →| (enter cell) icon on the
CROSSrow. The breadcrumb at the top-left of the canvas now readsTOP (top) › CROSS, which means anything you draw goes intoCROSS. Pick the Box tool from the Draw group and drag out a rough horizontal bar near the centre — you can't drag an exact 30 × 10 µm, and you don't need to. With the box still selected, type the real numbers into the Properties panel, which is authoritative: W30, then H10, then X-15, then Y-5(press Enter after each field). Width and height first, always — they scale the shape about its centre, so setting them afterwards would move the corner you just placed; Anchor is on Corner (the default), so X and Y are the box's lower-left corner. Then — and this catches everyone once — click Box again before the second drag: Glyph's draw tools are one-shot and drop back to Select after each shape. Drag a second, rough vertical bar across the first, then size it the same way: W10, H30, X-5, Y-15. That makes a 30 × 10 µm bar crossed with a 10 × 30 µm bar, both centred on the cell's origin. The status bar reads2 shapes · 1 selected.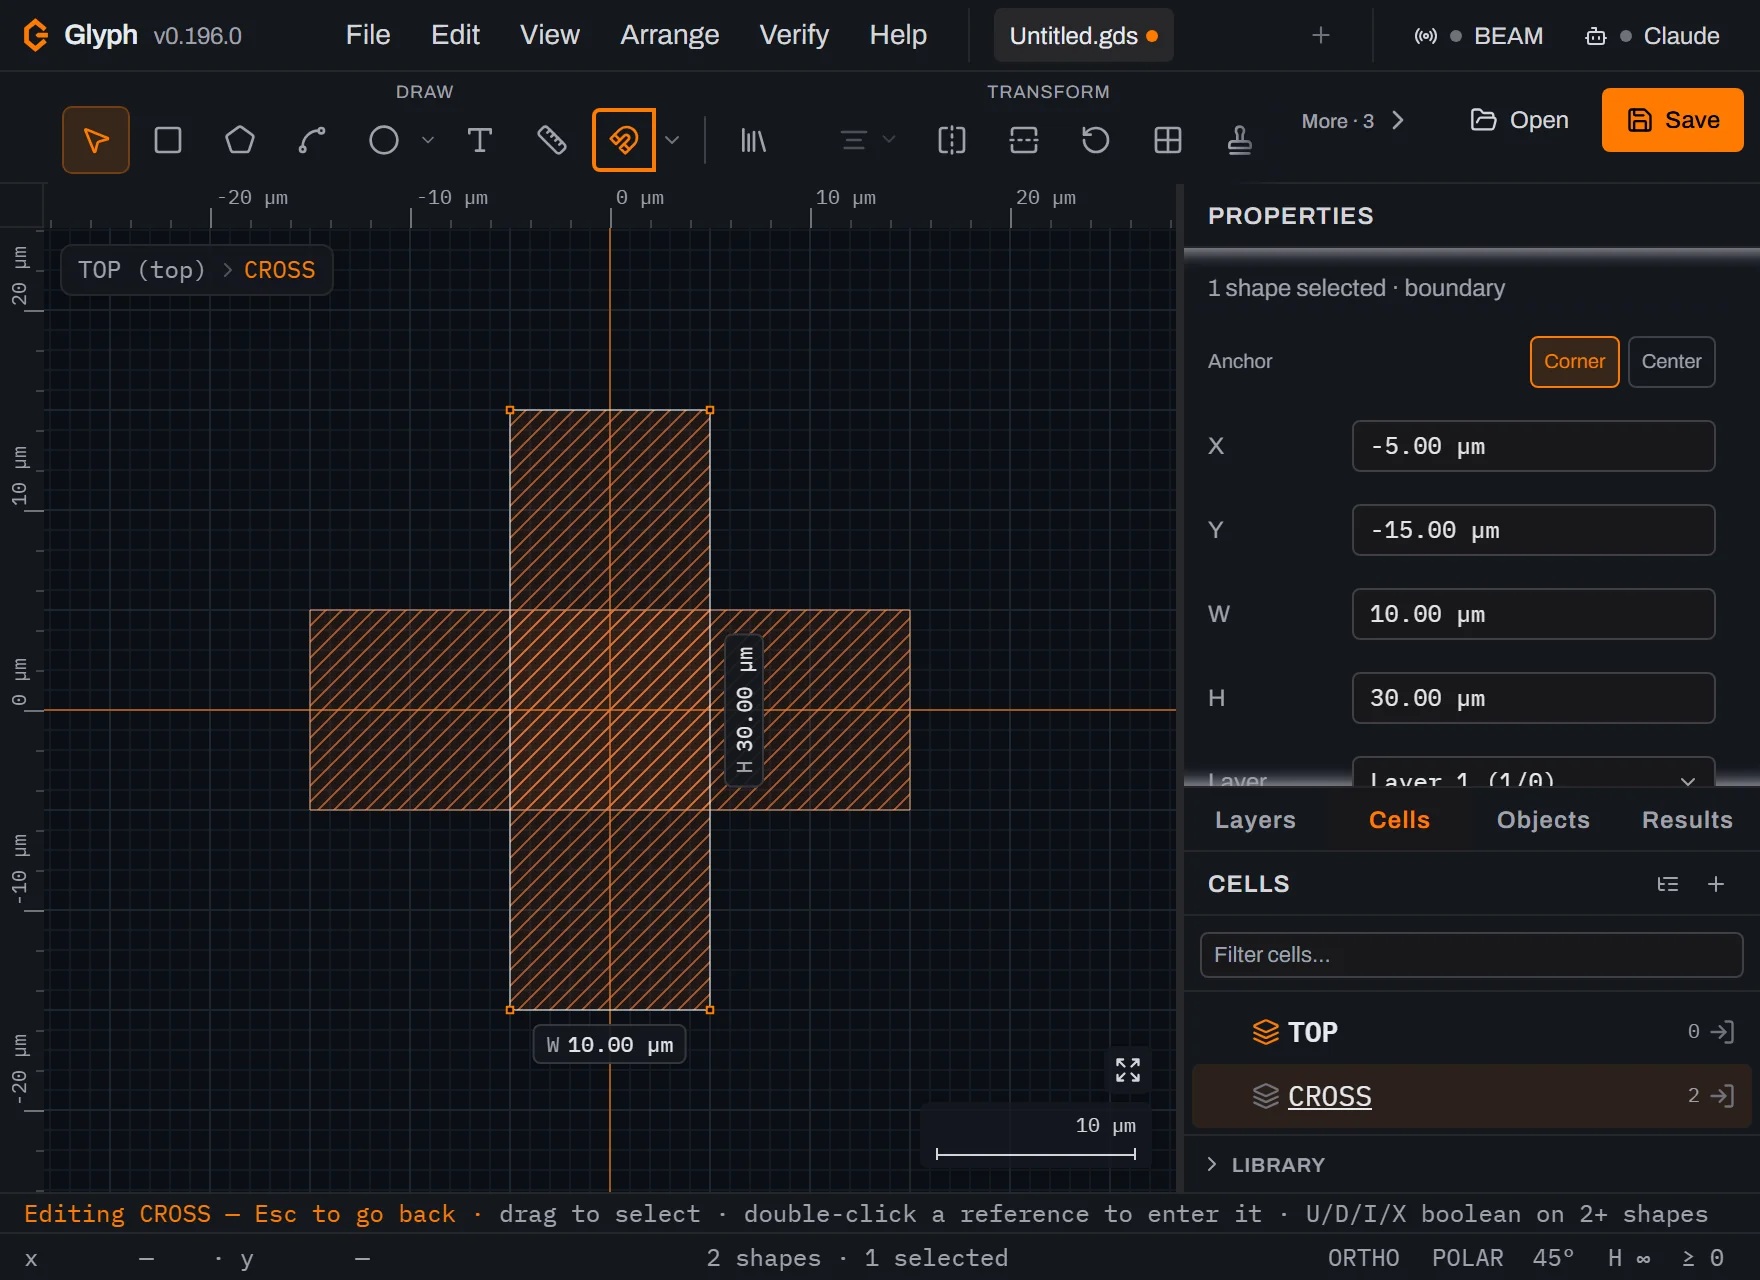 View full image
Find the instance icon. Click
TOP (top)in the breadcrumb to go back up, then hover theCROSSrow in the Cells panel. Seven small icons appear along its right end. Left to right they are: an eye (hide instances of this cell), a square (show instances as a box), a pencil (rename), stacked cubes (insert an instance, an SREF), a 3×3 grid (insert an array, an AREF), an arrow pointing into a bracket (enter the cell), and a waste bin (delete). The fourth one — stacked cubes — is Insert cell instance (SREF), and that's the one you want next.
Place one instance. This is the first step where the view needs to move: scroll the mouse wheel to zoom at the pointer, hold
Spaceand drag (or drag with the middle mouse button) to pan, and pressCtrl+0for when you have lost the drawing. Click the stacked-cubes icon, then click anywhere on the canvas roughly 250 µm to the left of the origin — the exact spot doesn't matter yet, because the next move fixes it precisely. A copy of the cross appears — except it isn't a copy. It is a reference (GDS calls it an SREF): a pointer toCROSSplus a position. It sits inside a thin outline a little larger than the cross itself — shown here in orange because it's selected, plain grey otherwise — and that outline marks the bounds of the instance, not an extra shape; the same kind of outline reappears around the array in a later step. Placing an instance does not select it, and the insert-instance tool may still be armed for another placement, so press Esc, then click the cross once with the Select tool to select the one you just placed, then in the Properties panel set X to-250and Y to0(press Enter after each). Press Ctrl+0 after setting X/Y to zoom to fit and confirm the instance landed where you expect. This exact position matters: a later step (the polar array's ring centre) is measured from it. The status bar reads0 shapes · 1 ref · 1 selected, becauseTOPitself still contains no geometry of its own.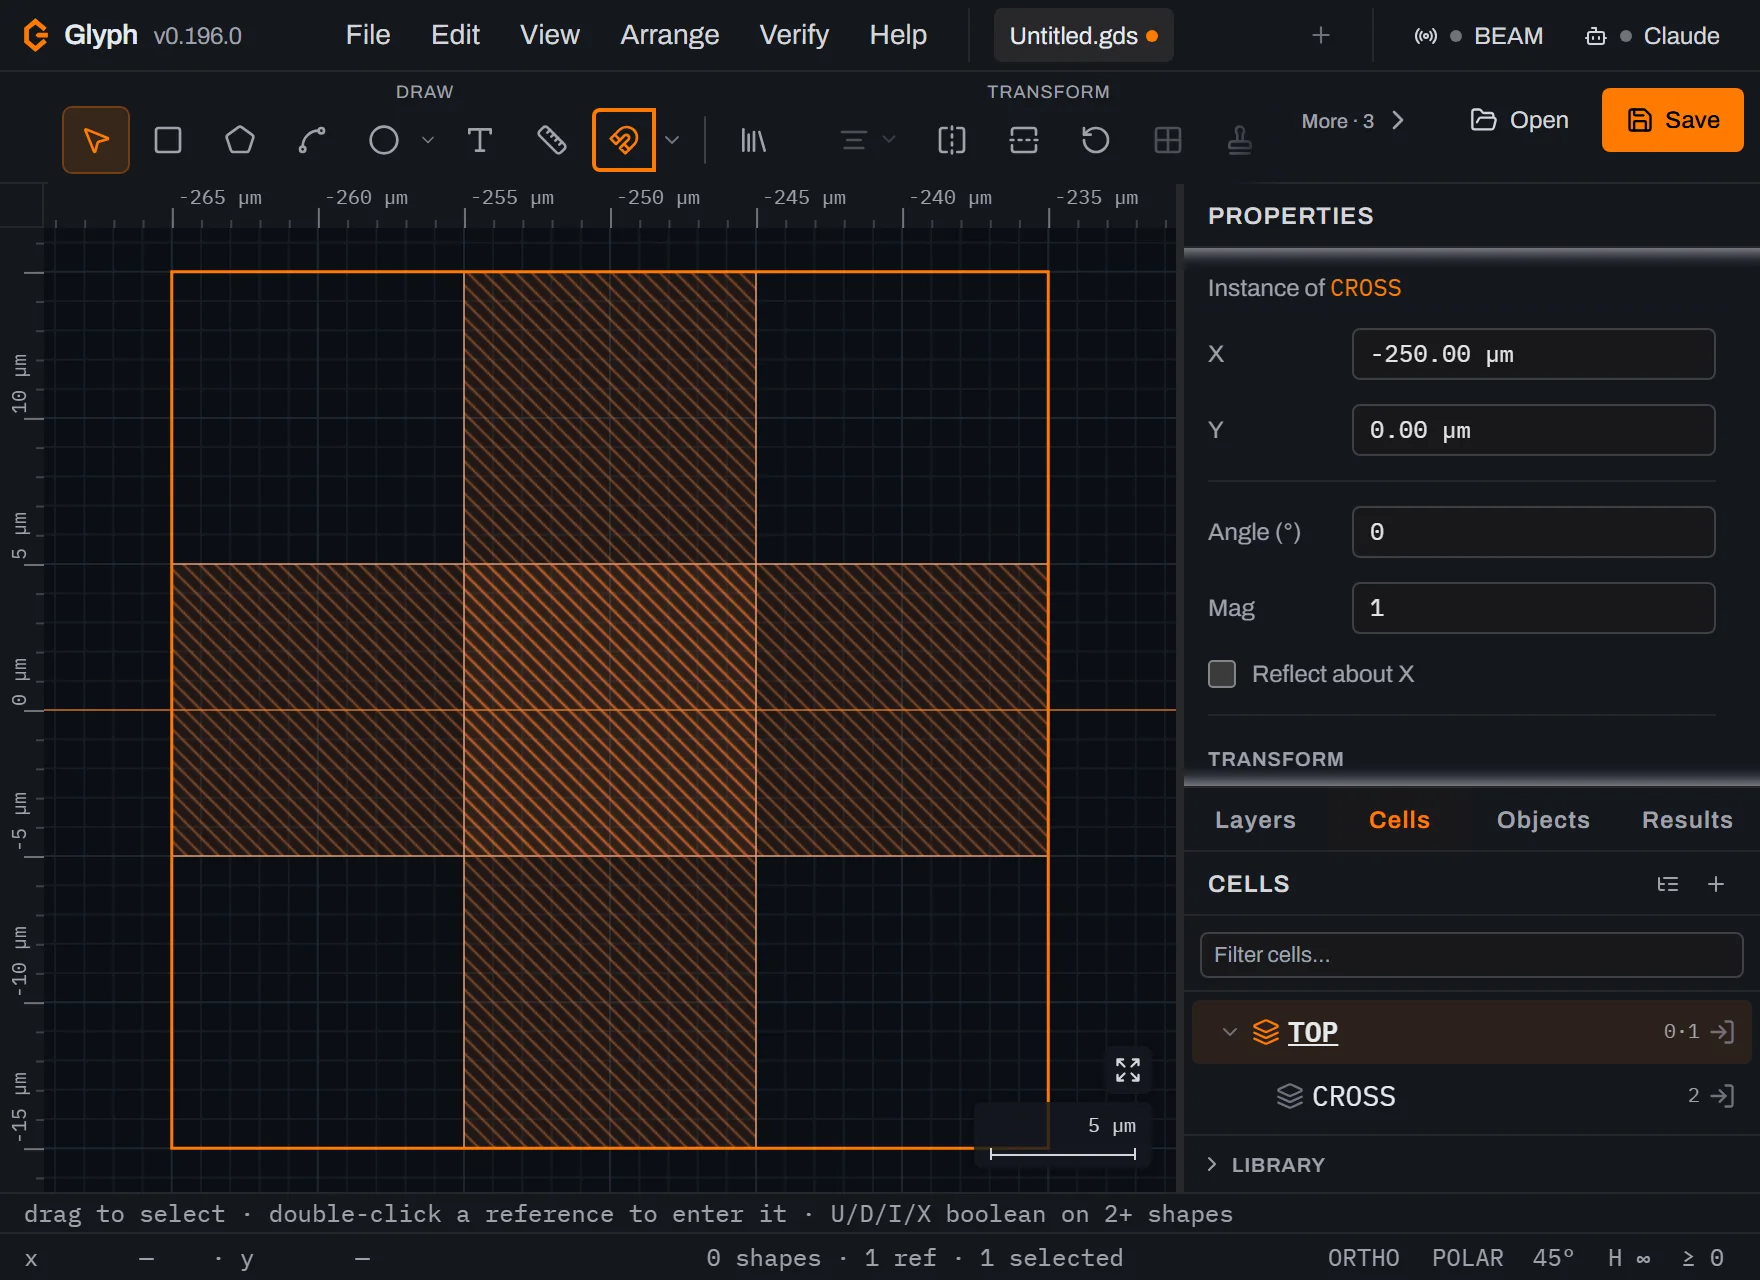 View full image
Find where CROSS went. The Cells panel now lists only
TOP. That is not a bug: the panel shows the hierarchy, andCROSSis no longer a top-level cell — it is used byTOP. Click the small disclosure triangle on theTOProw to expand it andCROSSappears nested underneath, with its shape count beside it.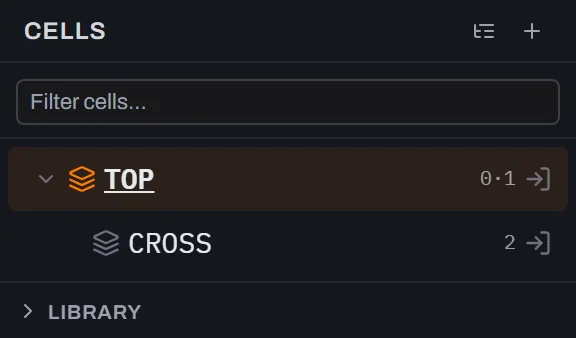
Find the array icon. Hover the nested
CROSSrow the same way you hovered it above. The same seven icons appear at its right end, now indented one level underTOP— the shot below keepsTOP's own row in view above it so the nesting is visible. The fifth one — a 3×3 grid of small squares — is Insert cell array (AREF).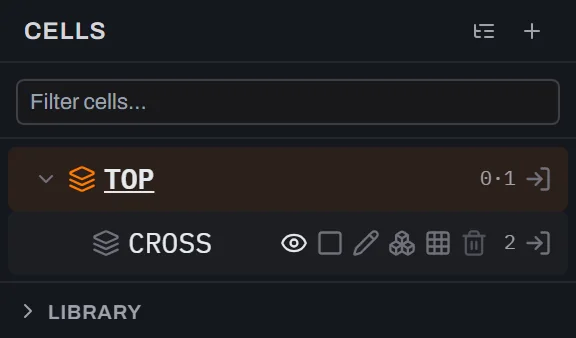
Set up a 3×3 array. Click that 3×3-grid icon. The Insert array of CROSS dialog opens with two counts and four length fields — Rows, Cols, then Col step X, Col step Y, Row step X, Row step Y — plus Rotation, Magnification and a Reflect about X axis checkbox. Set Rows to 3, Cols to 3, Col step X to 40 µm and Row step Y to 40 µm — that is a 40 µm pitch in both directions, comfortably clear of the 30 µm cross. Leave Col step Y and Row step X at their default
0(they only matter for a sheared lattice, not a plain rectangular grid), rotation at 0, magnification at 1, and the Reflect checkbox unticked.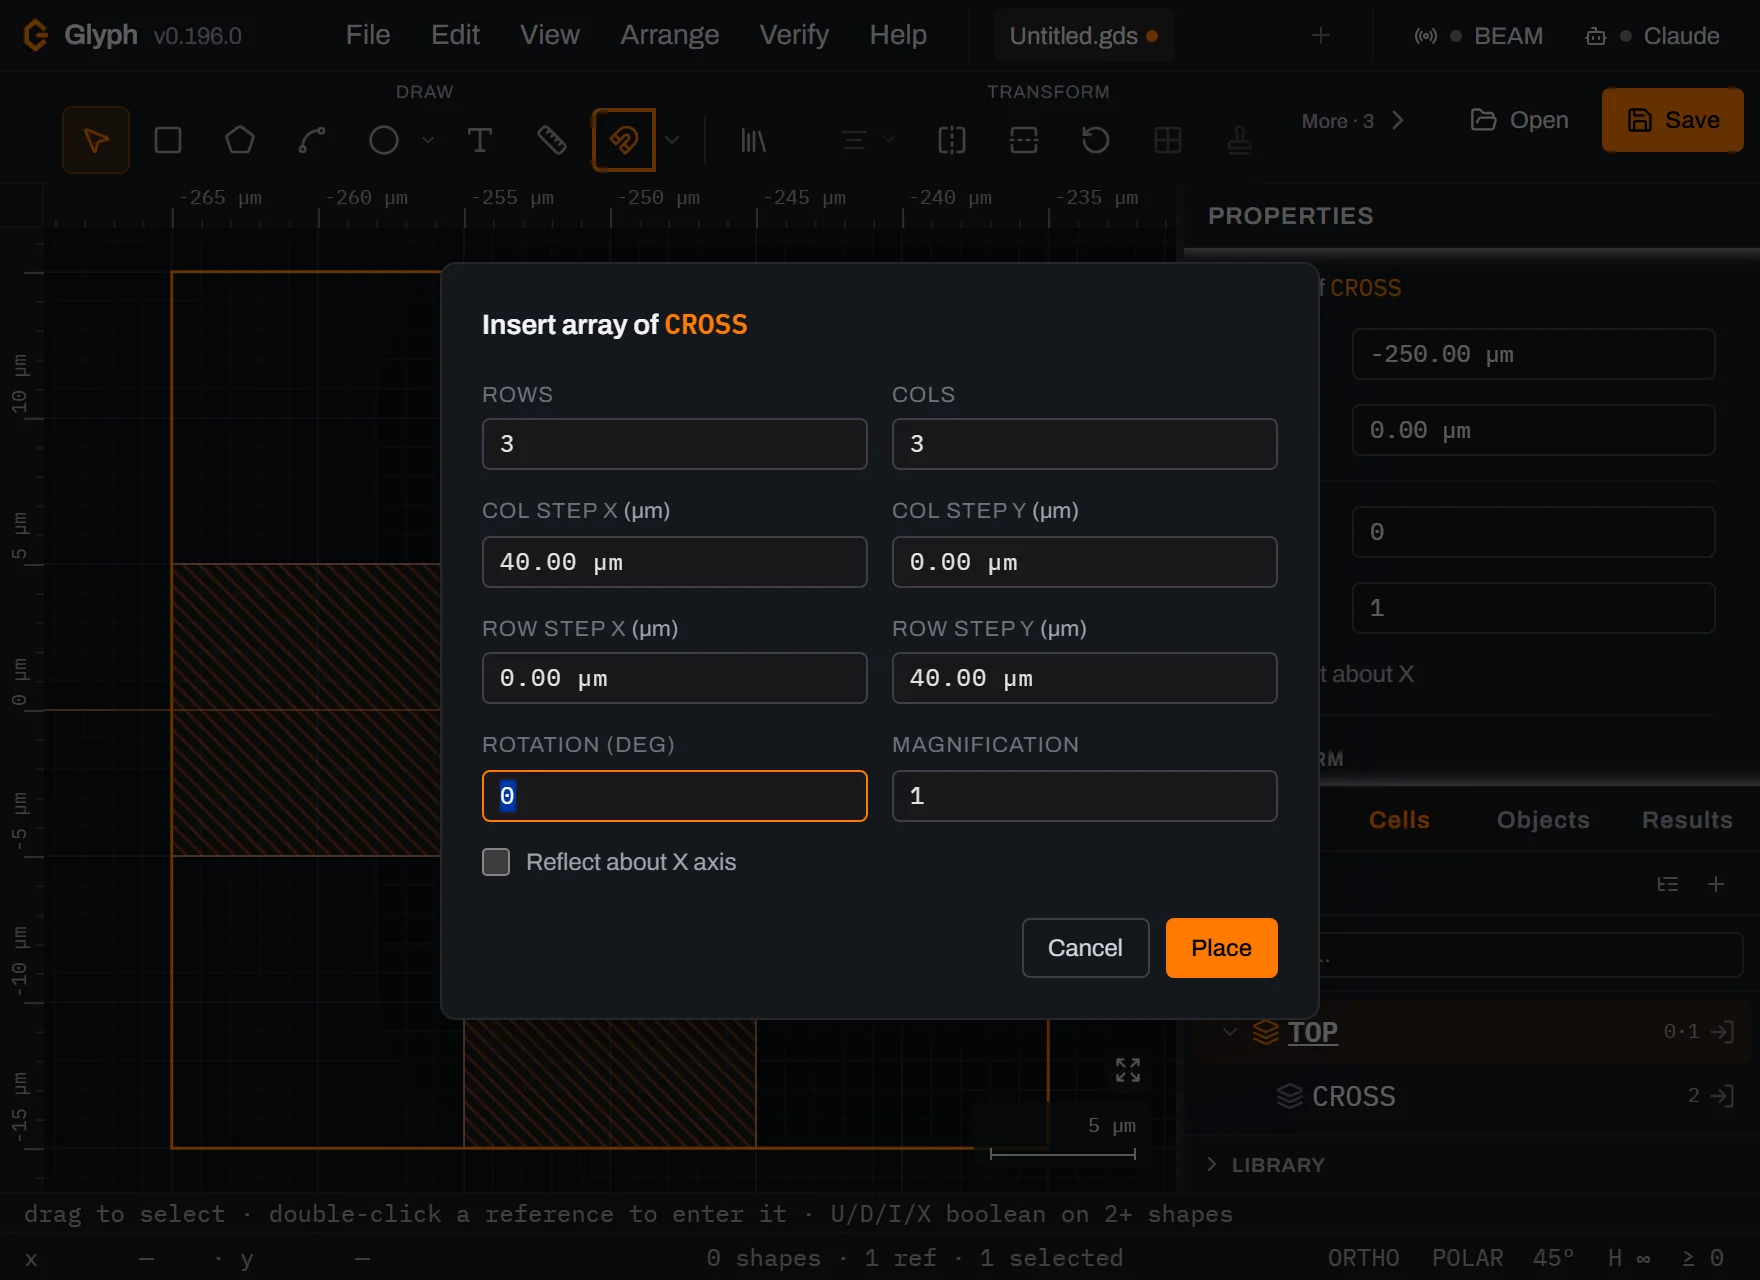 View full image
Drop the array. Click Place, press Ctrl+0 to zoom to fit so both your first instance and open canvas to its right are in view, then click near X 50 µm, Y -40 µm — a spot that stays clear of the 100 µm-radius ring you'll add around the first instance in the next step. Nine crosses appear on a regular grid inside a thin outline — the same kind of bounds indicator from step 4. In the file this is a single AREF record — rows, columns and two step vectors — not nine separate objects, which is why an array of a million features costs almost nothing. The nine crosses on the right carry the same diagonal hatch as the lone instance on the left: an array is a cheaper record, not a different-looking one, so what you compare on screen is geometry rather than a rendering artefact. The status bar reads
0 shapes · 1 ref · 1 array · 1 selected— the "selected" is still the single instance from step 4, which is why the Properties panel still shows its X and Y from a moment ago.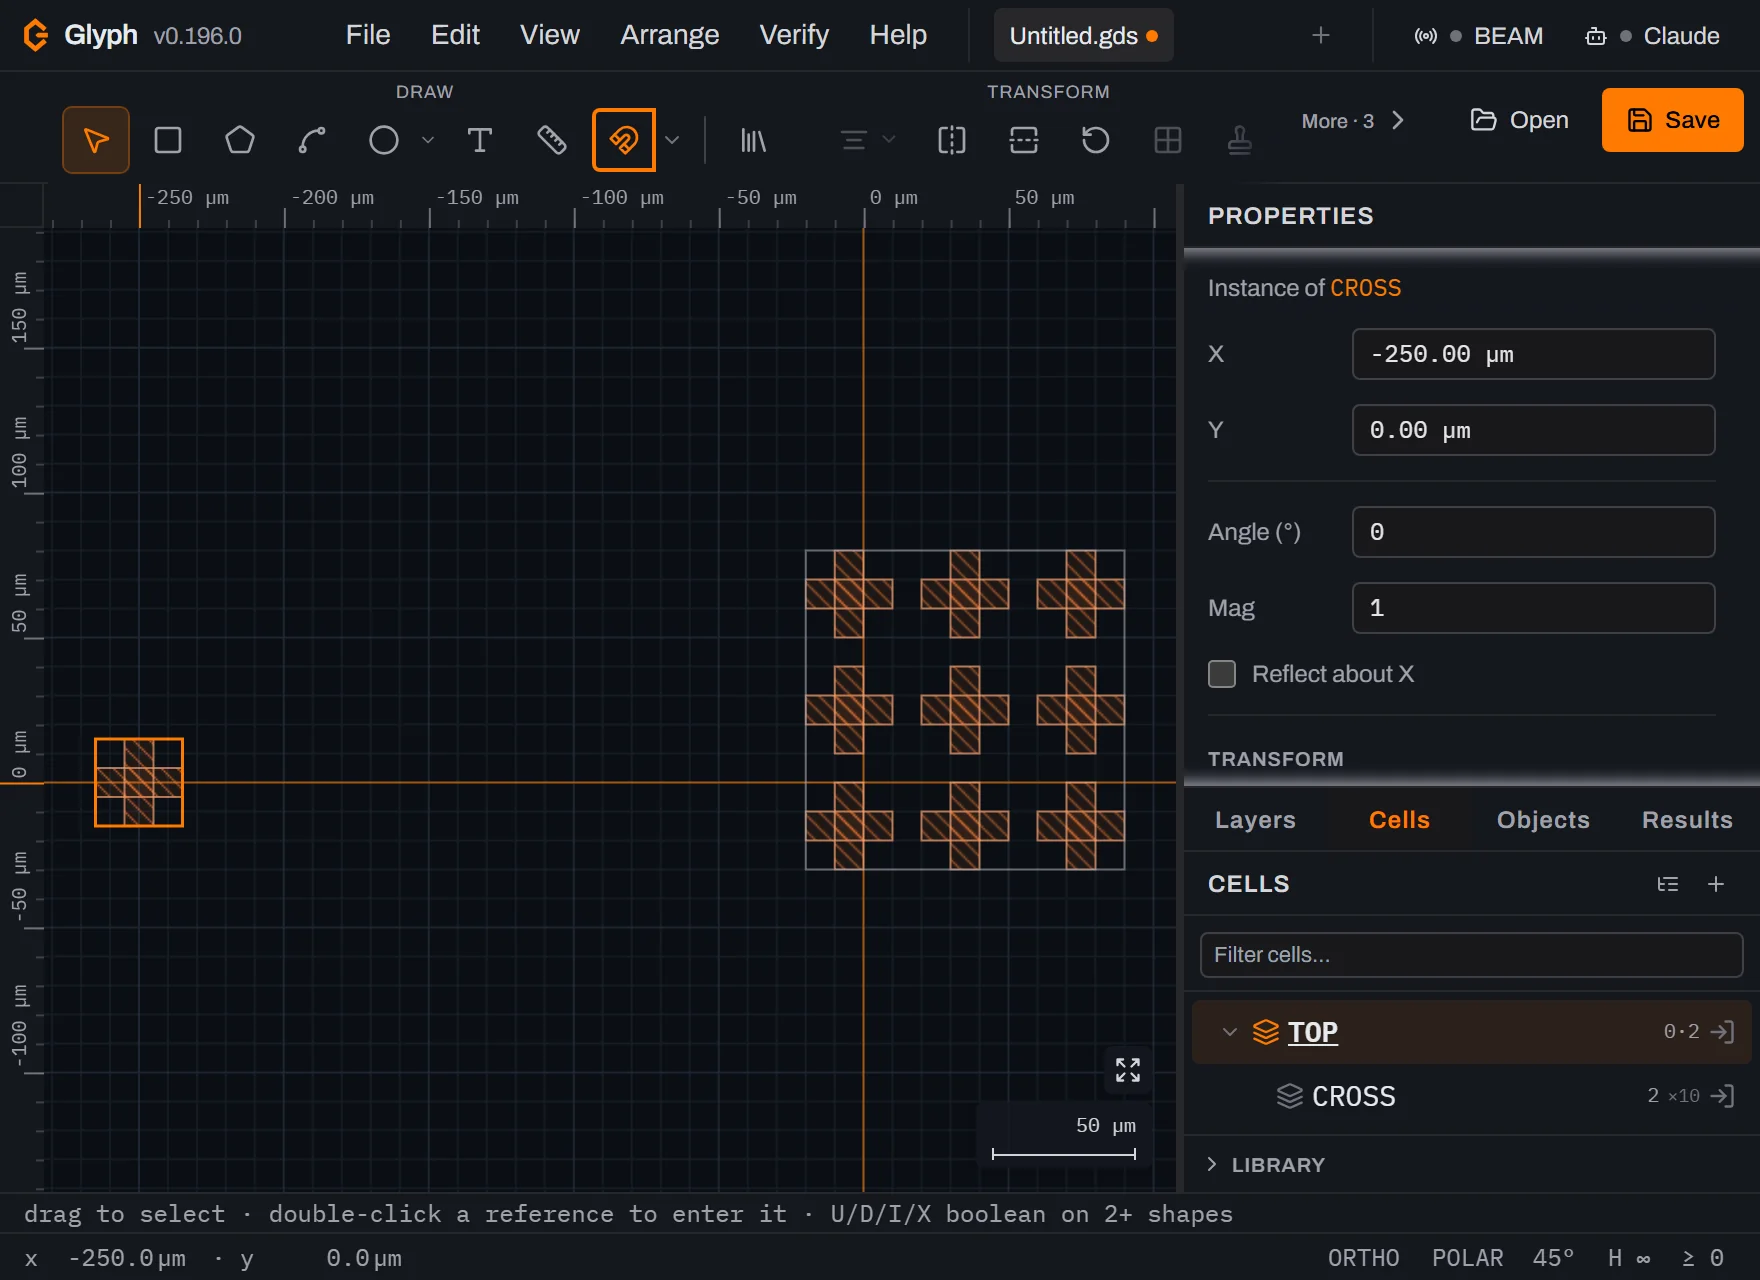 View full image
Set up a ring. GDS has no radial array, so a ring is genuinely N separate placements — Glyph plans them for you. Click the Select tool, click the lone instance on the left to select it, then choose . Type a Centre X of
-150µm and Centre Y of0— that works out to 100 µm to the right of the instance only because you set the instance to exactly X-250, Y0back in step 4, so the copies sweep a 100 µm-radius circle. Set Copies to 8 and Sweep to 360. The dialog states what it will do:7 new objects at 45.00° steps. The count includes the original, and a full 360° sweep divides by the count so the last copy never lands on the first.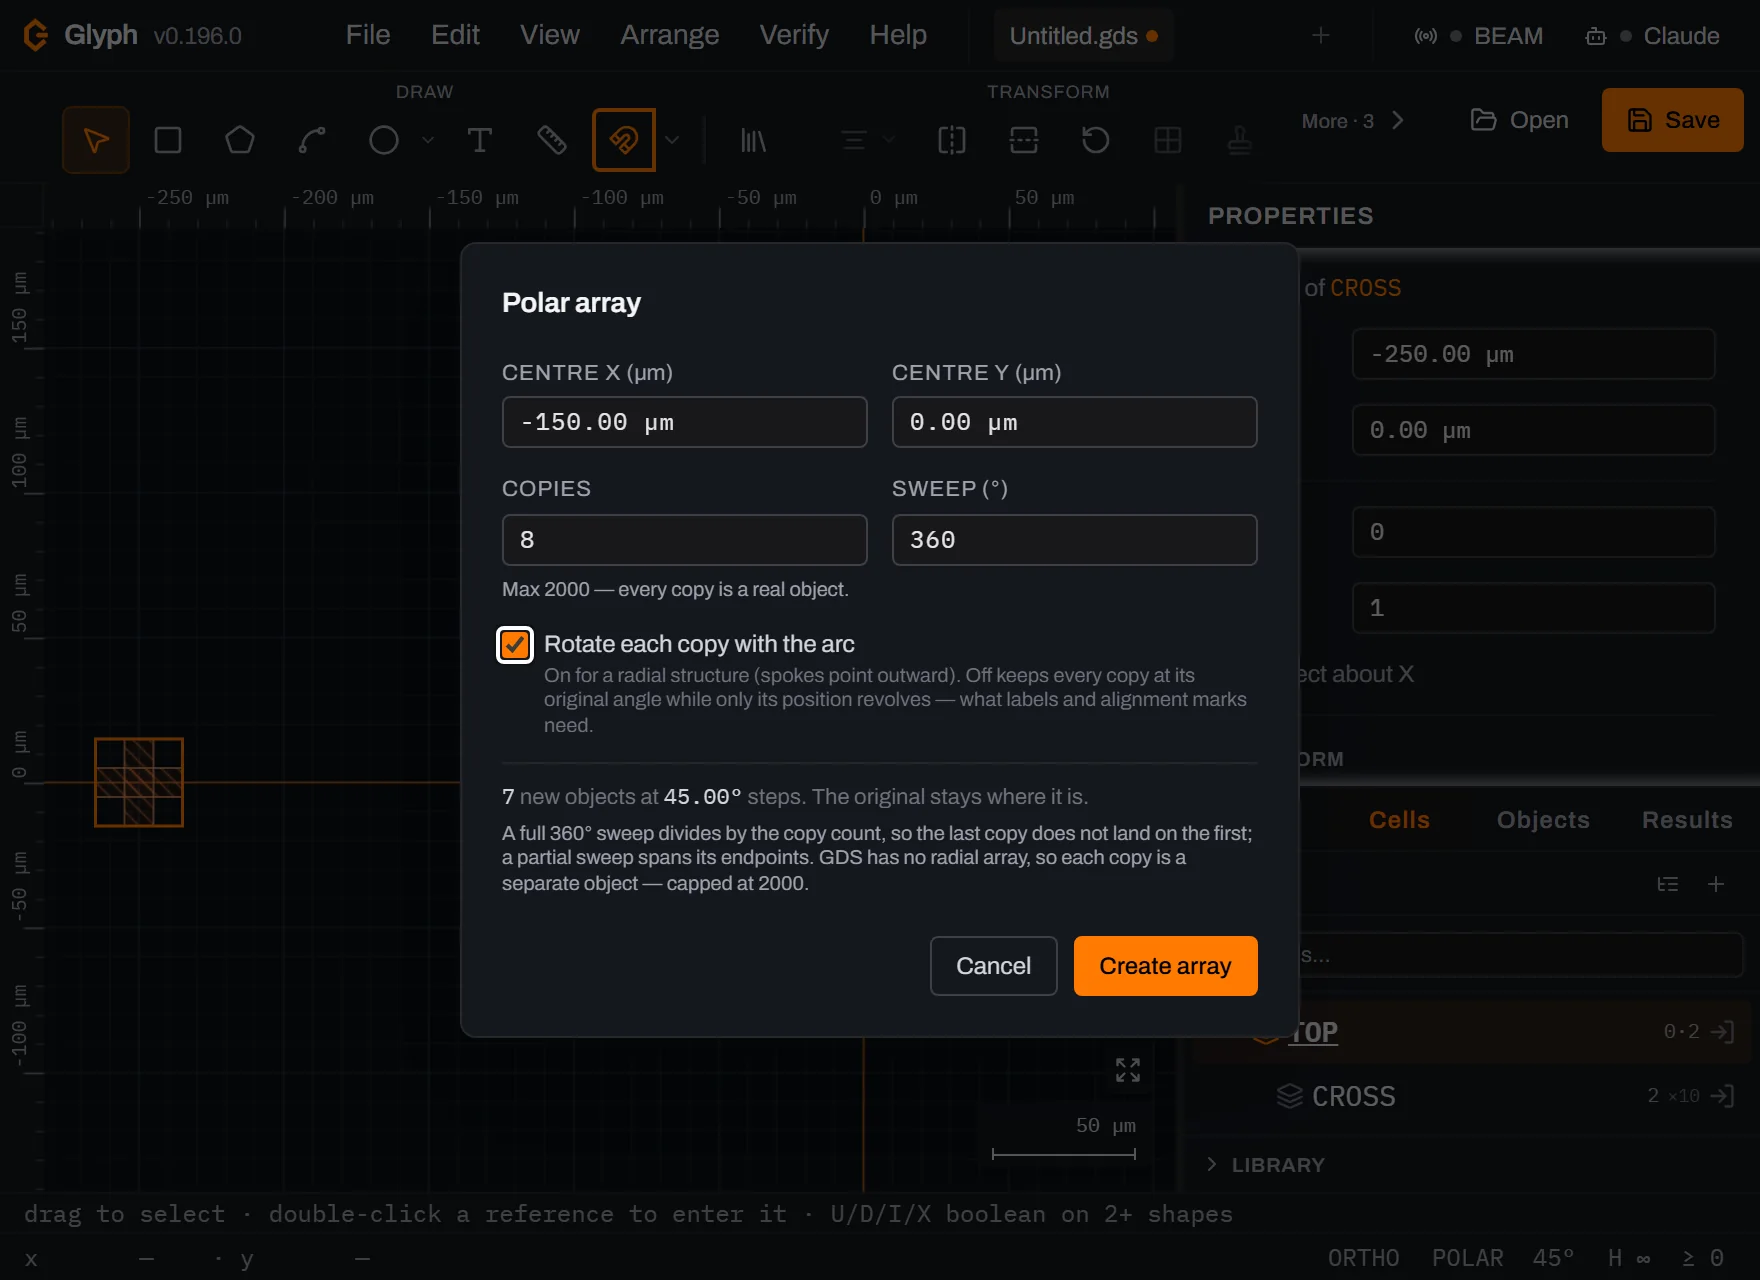 View full image
Create the ring. Click Create array. Eight instances now sit at 45° intervals around the centre you typed, each rotated to follow the arc. The crosses themselves still just read as rotated crosses — an X shape at the odd angles — but the thin bounding-box outline around each instance is a square, and a square rotated 45° reads as a diamond; that's what you're seeing at the four diagonal positions, not a different shape underneath. A toast confirms
Added 7 copies at 45.00° stepsand the status bar reads0 shapes · 8 refs · 1 array · 8 selected. Untick Rotate each copy with the arc next time if you want labels or alignment marks to stay upright as they revolve.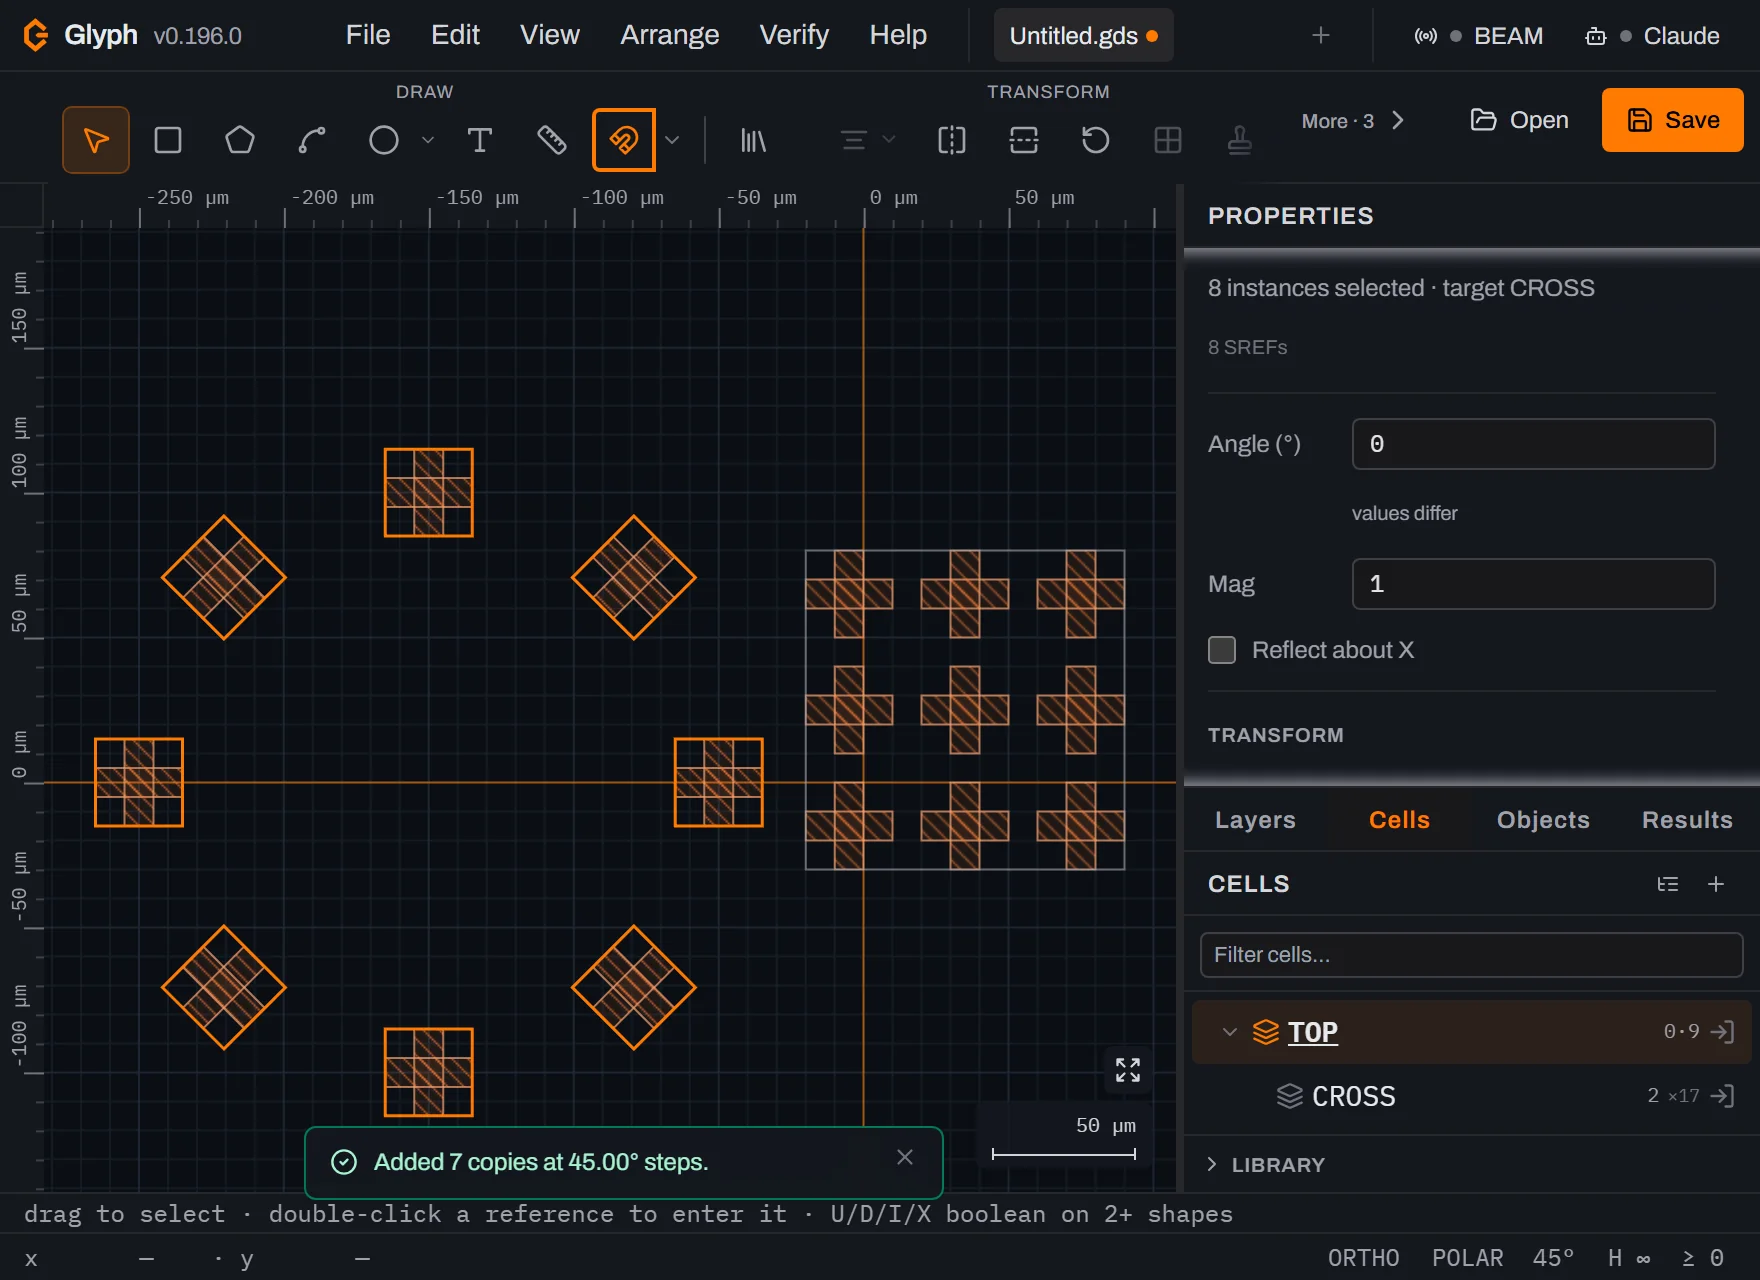 View full image
Control how deep Glyph draws. On a real design, drawing every instance to full depth is slow and visually noisy, so Glyph lets you cap the depth. Press Ctrl+K for the command palette and type
hierarchy. Five commands appear: show all levels, boxes only, top level only, one level more, one level less.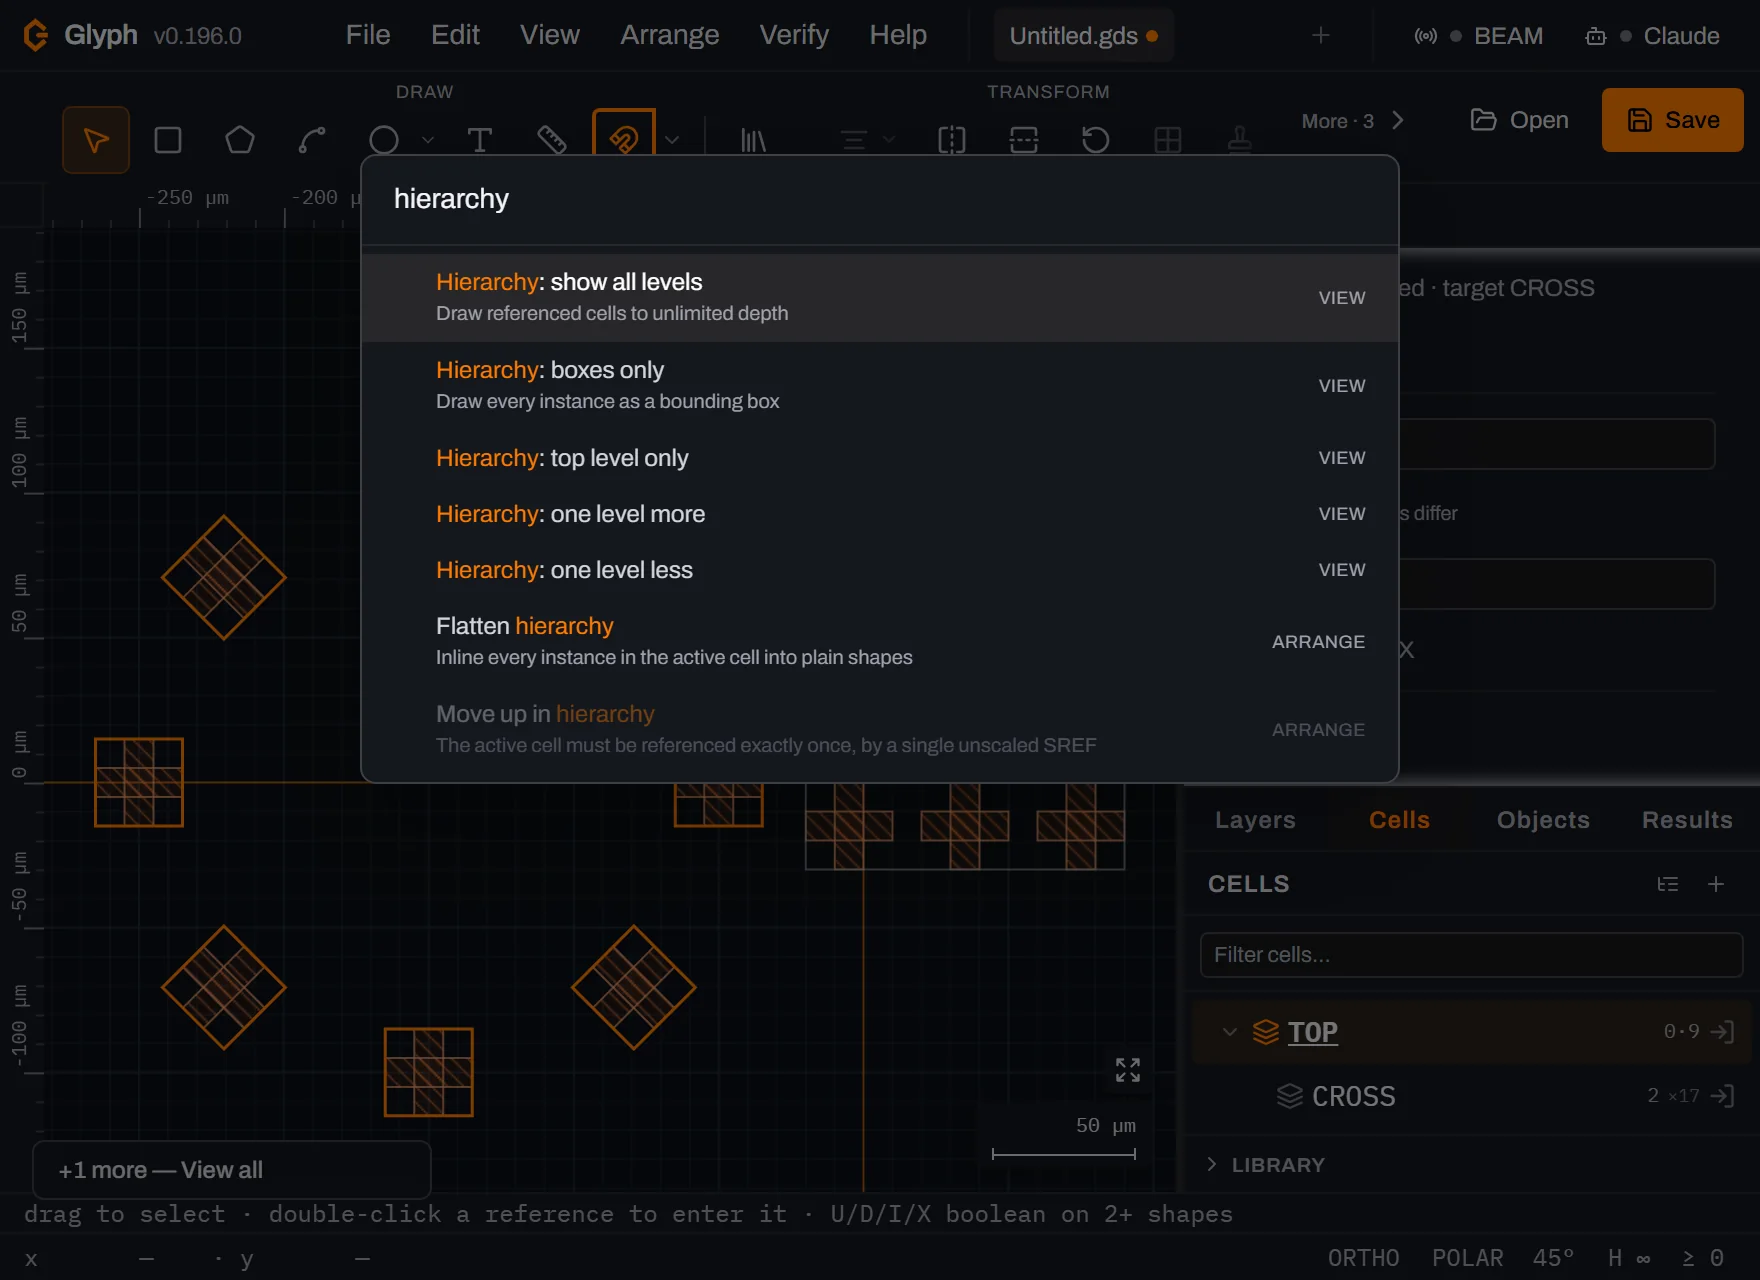 View full image
Pick "Hierarchy: boxes only". Every instance is now drawn as a plain outline of the space it occupies, and nothing inside
CROSSis drawn at all. The document has not changed — this is purely how much of it gets painted. It is the fastest way to see the arrangement of a dense chip.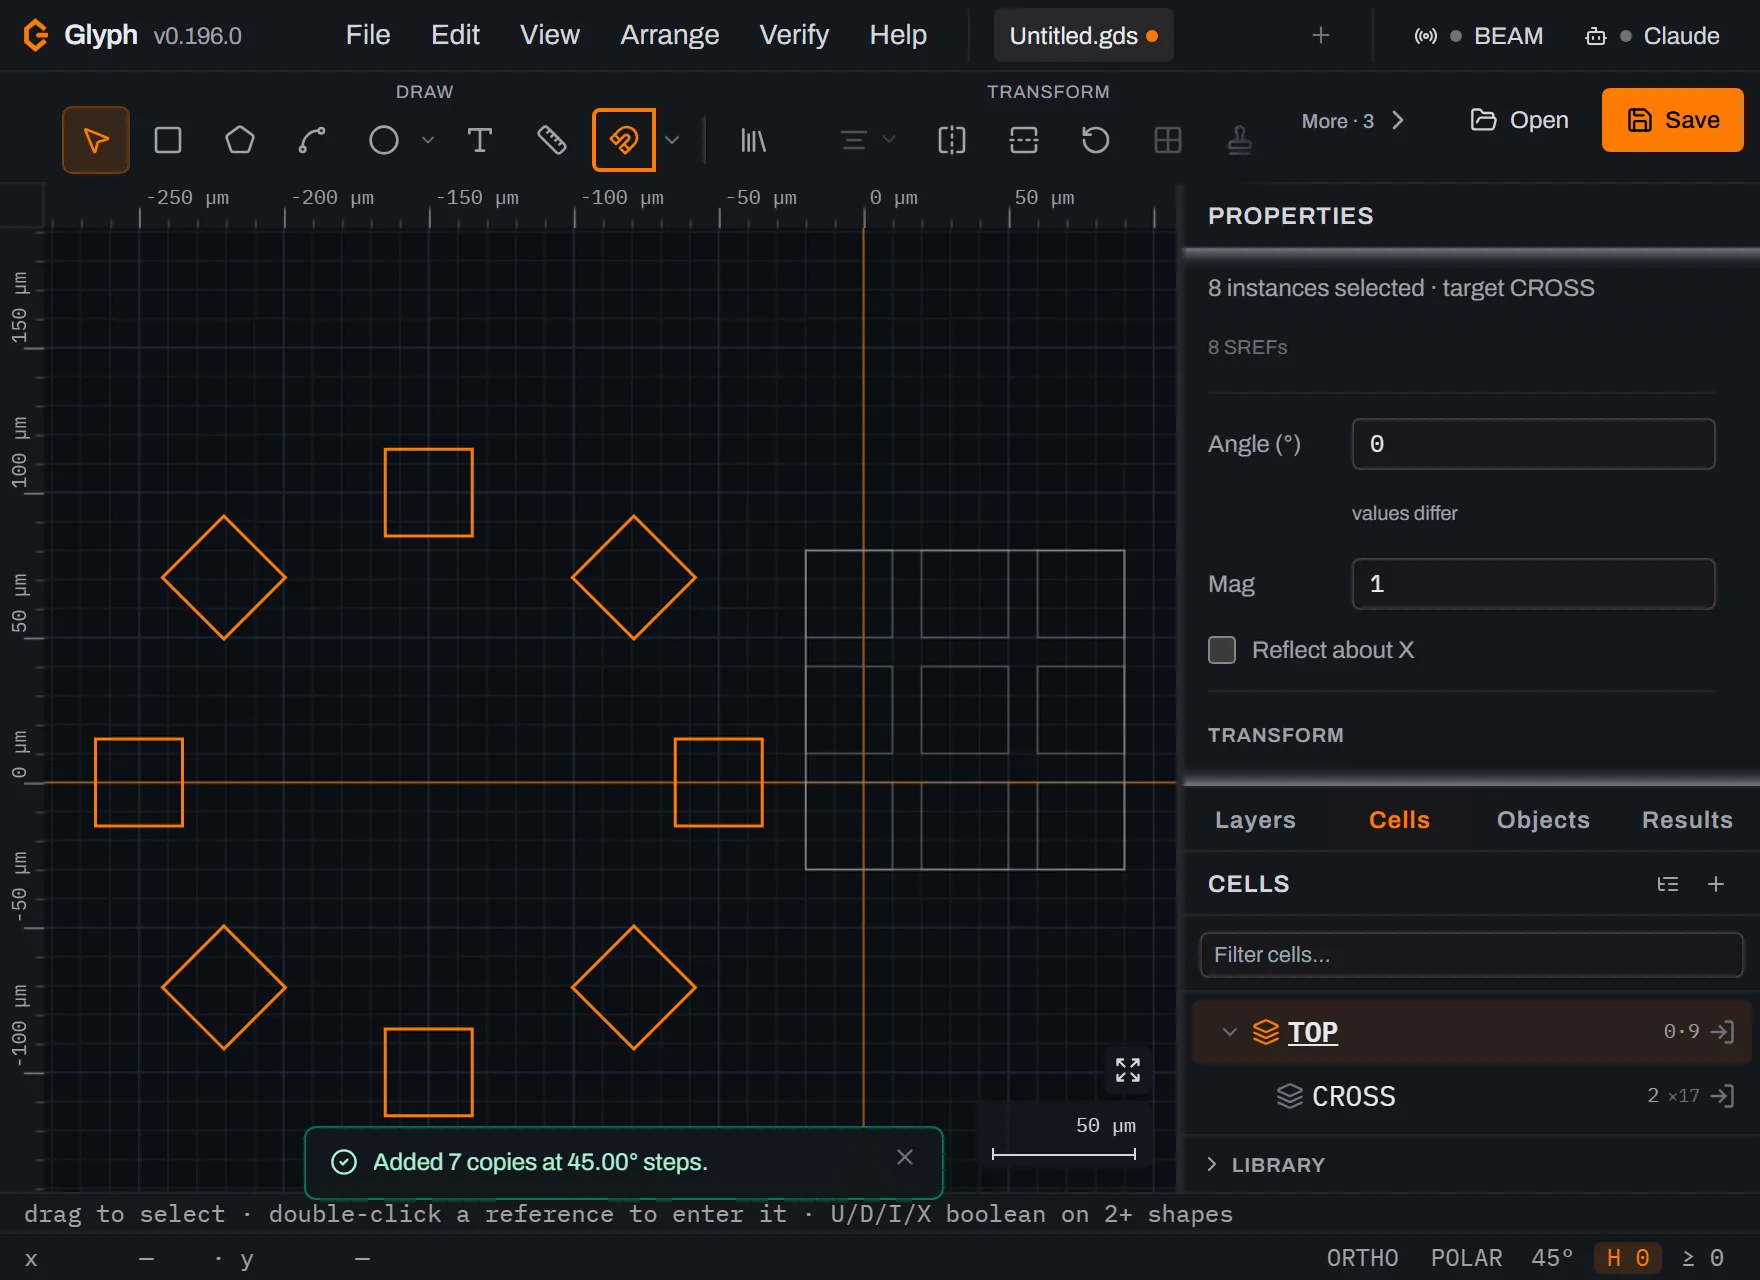 View full image
Read the level off the status bar. At the bottom right, the H badge tracks that setting. It read
H ∞(unlimited) at the start of this guide; after step 12 it readsH 0, and it is highlighted to tell you the view is capped. The badge is also a control: click it to cycle∞ → 0 → 1 → 2 → 3and back, and right-click it to jump straight back to∞. Beside it sits a second badge reading≥ 0— the hierarchy minimum level: levels below it stop drawing entirely rather than falling back to a box, so raising it prunes from the bottom of the tree the same way the H badge prunes from the top. This guide never changes it, so it stays at its default≥ 0throughout.
Inspect what is actually in the cell. Right-click the H badge to return to
H ∞, then open the Objects tab. It lists the contents of the cell you are editing — here9 objects in TOP: the eight instances ofCROSSand the one array. Each row also shows a size figure in µm, though at this panel width it's clipped to a couple of decimal places — drag the panel's inner edge wider (as noted at the top of this guide) to read it in full. For the Array row that figure is the footprint of the referenced cellCROSSitself (30 × 30 µm) — not the roughly 110 × 110 µm the whole 3×3 array occupies on screen once its 40 µm pitch is counted. Note what is not listed: the two boxes you drew live inCROSS, not inTOP. Click any row to select and frame that object.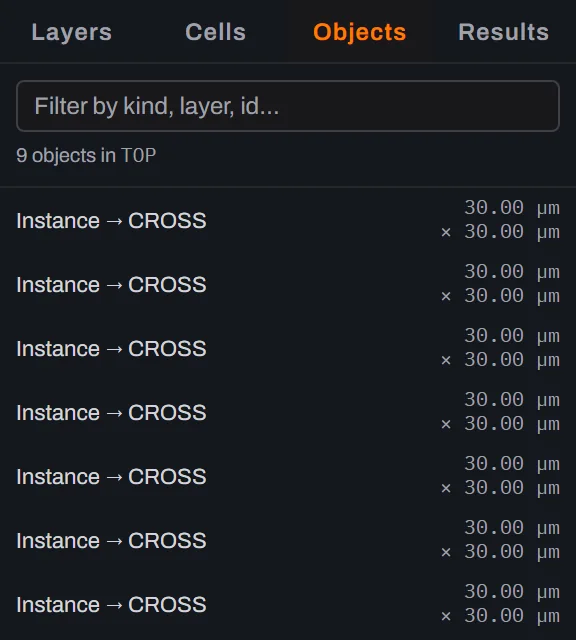
Reusing cells from another file (the external symbol library)
Everything so far repeats a cell you drew in this document. Real layouts often need the opposite: reuse a cell someone else already built — a facility's standard alignment-mark set, a foundry's PDK symbol, a test structure from a previous project — without redrawing it. The Library section at the bottom of the Cells panel does exactly that: it opens another design file (any format Glyph can open — GDS, OASIS, CIF, DXF, DWG, SVG among them) as a read-only reference, lists its cells, and lets you drop instances of them into the document you're actually editing.
Click the collapsed Library header to expand it, then Open… and pick any file. Glyph parses it once into a detached copy held only for this browser session — it is never autosaved and never becomes a tab of its own, so it doesn't clutter your Cells panel or your undo history the way opening a second document would. The section then lists every cell in that file, each row showing its own shape and reference counts. Click one, and two things happen in order: the click itself copies that cell — plus everything it references — into your document, then arms the same placement ghost an ordinary "insert instance" click uses, so you place it exactly like an SREF you made yourself. Click the same row again to drop as many further instances as you like; a repeat placement of a cell you've already imported reuses that same copy rather than importing it a second time, so ten instances of one library symbol cost one copied subtree, not ten.
Two behaviours worth knowing before you rely on this:
- The import happens on the click, before you place anything. Pressing
Esccancels the armed placement ghost, but it does not undo the copy — the imported cell is already in your document as its own undo entry.Ctrl+Z, notEsc, is what removes it if you change your mind before placing an instance. - It's a one-time import, not a live link. Editing the source file afterward changes nothing in
your document, and a name that collides with one you already have gets the same
_N-suffix rename that duplicating a cell or pasting one already uses. The provenance that makes repeat-placement reuse work (Cell.libSource, matched against the exact file plus the cell's original name in it) rides only for the current session and is never written to.gds— reopening a saved file later and importing the same source again brings in a fresh copy under a renamed cell, not a reconnection to the first one.
What you built
A two-level design. CROSS holds the only real geometry — two boxes. TOP holds seventeen placements of it (eight single instances in a ring, plus a 3×3 array carried in one record) and no geometry of its own. Edit either box inside CROSS and all seventeen update at once, because none of them is a copy.
That is the whole idea behind hierarchy in GDSII, and it is what keeps a full reticle to a file size a laptop can open.
Next steps
Read Cells and hierarchy for the rules on top cells, entering cells and flattening, and Instances (SREF and AREF) for what each reference type stores — rotation, magnification and mirroring included. The rest of the repeat-and-arrange toolkit is in Arrange, and every shortcut used above is listed in Keyboard shortcuts. Then open the editor and build the cell your own design keeps repeating.