Export publication-quality figures from a GDS layout
A GDS layout on screen has a dark canvas, hatched fills, and layers you may not want visible in a paper or slide. Glyph's Export figure turns the same geometry into a clean vector or raster figure — white background, solid fills, an outline on every polygon, a scale bar, and a layer legend — without redrawing anything.
- Time: ~5 min
- You'll need: a GDS layout open in Glyph, with the layers you want visible turned on.
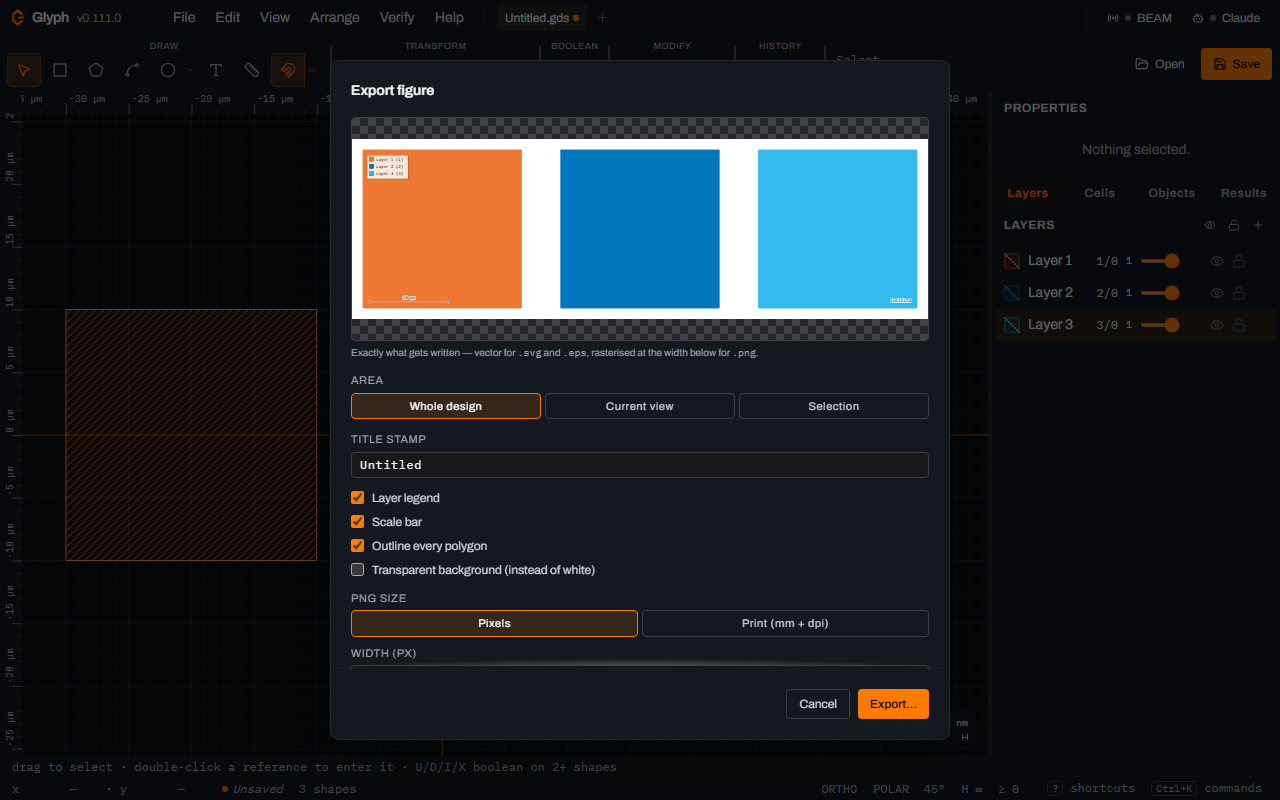 View full image
- Open your layout. Go to Glyph and open your
.gdsfile — drag it onto the window or use . - Choose which layers and colours appear. Toggle layer visibility in the Layers panel for anything you don't want in the figure, and set each layer's colour chip to whatever you want printed — the figure exporter uses the same layer palette as the editor.
- Open the figure exporter. Go to .
- Toggle the figure elements you want: the layer legend (only layers that actually carry geometry are listed), the scale bar, and a title stamp are each individually switchable. None of them covers your geometry: the legend sits in a column to the right of the design, and the scale bar and title in a strip below it.
- Pick a format. The dialog's Format choice is SVG for a vector figure you can scale into any size, PNG for a raster image, or EPS for a PostScript vector figure — the figure PNG renders off-screen over the whole design at a width you choose, so it doesn't depend on your window size or current zoom level the way a plain screenshot would.
- Save. In a browser with a save dialog (Chrome, Edge) you pick the file name there, and the extension you give it decides the format; in one without (Safari, Firefox) the file is downloaded in the format you chose in the dialog.
Construction shapes and bitmaps are excluded from every export, including figures, so tracing guides and reference images never leak into the output. If you need a raw (non-figure) conversion instead — say, to hand-edit the SVG yourself — use and pick .svg directly; see GDSII to SVG for how that plain conversion works.
What you built
A white-background, solid-fill SVG or PNG figure of your mask layout — with a scale bar and layer legend if you asked for them — ready to drop into a paper, a slide deck, or a patent figure, generated entirely from the same geometry you designed, with no separate drawing tool involved.
For the full list of Glyph's save and export formats — GDS, SVG, PNG, per-layer masks — see Open and save GDS files. For how the underlying GDS-to-SVG conversion works, see the GDSII to SVG reference.
Next steps
A figure documents a design you've already finalized — the next step for the design itself is fabrication. Next: choose a resist for your process, then expose the mask behind the figure you just exported. See the photoresist glossary for resist basics, or maskless lithography for how a design like this gets exposed without a physical photomask.