Run a design-rule check before you expose
A design-rule check (DRC) catches geometry your process can't actually make — a gap too narrow to resolve, a feature too thin to survive etch — before you commit to exposing it. In Glyph, that's a per-layer rule table plus one keyboard shortcut, F7.
- Time: ~10 min
- You'll need: a Glyph document with at least one drawn layer — see Design your first photomask if you don't have one yet.
 View full image
- Open the rule table. In Glyph, go to . You get one row per layer, with columns for min width, min spacing, and min notch (all three in µm), plus min area (µm²). Leave a cell blank to skip that particular check on that layer. The same dialog has its own Layer-pair rules table below the per-layer one — "+ Add rule" there checks enclosure (e.g. a via sitting inside its metal), minimum spacing between two named layers, no overlap (the two layers must never share area — resist tones, mutually exclusive masks), or must intersect (every island on one layer needs a partner on the other — a via with no metal under it, for instance), none of which the per-layer rules above can express.
- Set rules for your process, or use a one-click writer preset — laser (1.5 µm), e-beam (200 nm), or BEAM (500 nm) — to set the min-width floor on every layer at once, then adjust individual layers from there.
- Run the check. Press
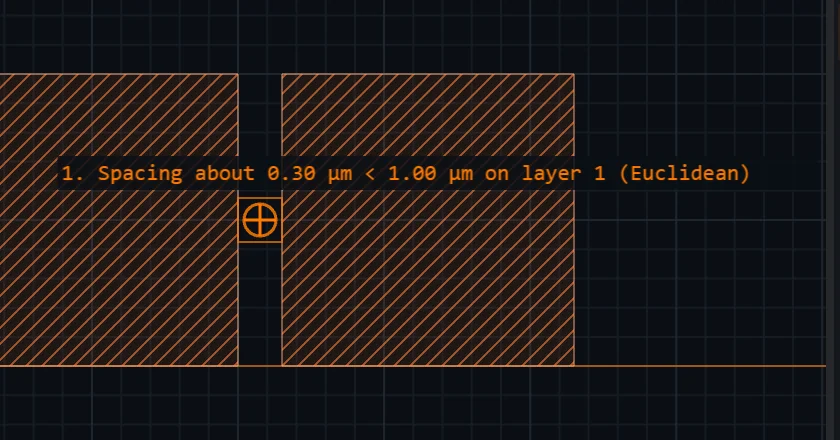
F7(or ). Glyph expands every SREF/AREF in the active cell before checking, so a spacing violation between two instances of the same cell — which only exists once they're placed near each other in the parent — is still caught, not hidden by checking the un-expanded cell. - Step through the violations. Each violation appears as a numbered marker on the canvas. Press
F2/Shift+F2to jump from one to the next; the view zooms to each marker with enough surrounding geometry to see what's wrong. - Fix each one with your normal editing tools — widen a boundary, nudge two shapes apart, or delete a sliver — and re-run
F7to confirm it's clear. - Clear the markers once you're done via , or just leave them — they don't affect export either way.
DRC in Glyph is strictly read-only: it never touches your drawing or the undo stack, and it runs in a background worker with a Cancel button so a dense layer doesn't freeze the UI. Rules are remembered per browser, not per document — they describe the process you intend to fabricate with, not the specific file, so the same rule table follows you across documents. Boundaries, boxes and widened paths are checked for width and spacing (a path with a real width is treated as the polygon it exposes); a spacing violation is further classified as a self-touching notch (judged against its own threshold once you set one) or a genuine isolated gap between separate polygons, reported and counted separately. Cross-layer checks exist too, as the separate layer-pair rules above (enclosure, minimum pair spacing, no-overlap, must-intersect) — what's still not checked is a zero-width centreline path under width/spacing, the min-area rule on any path, and connectivity — and Glyph states in the results exactly what was and wasn't checked rather than silently reporting clean.
What you built
A layout that's been checked against your process's real geometric limits — minimum width, minimum spacing, minimum area — with every instance expanded so hierarchy can't hide a violation. That's the check worth running right before you export the final .gds for exposure.
For the full rule reference and what each check does and doesn't cover, see Design-rule check (DRC) in the docs. Once your layout is clean, head back to Glyph to export it.
Next steps
A clean DRC result tells you the geometry is manufacturable — it doesn't expose anything by itself. Next: choose a resist for your process, then expose the mask you just checked. See the photoresist glossary for resist basics, or go straight to maskless lithography to see how a checked design gets exposed without a physical photomask.