Draw a waveguide ring resonator
A ring resonator is an annular waveguide brought close enough to a straight bus waveguide that light couples between them across a narrow air gap. Glyph's photonics library ships this as one parametric component — ring plus bus, both single-layer — so you set a radius, a core width, and a coupling gap instead of drawing the geometry by hand.
- Time: ~8 min
- You'll need: Glyph open, with an active layer chosen for the waveguide core.
 View full image
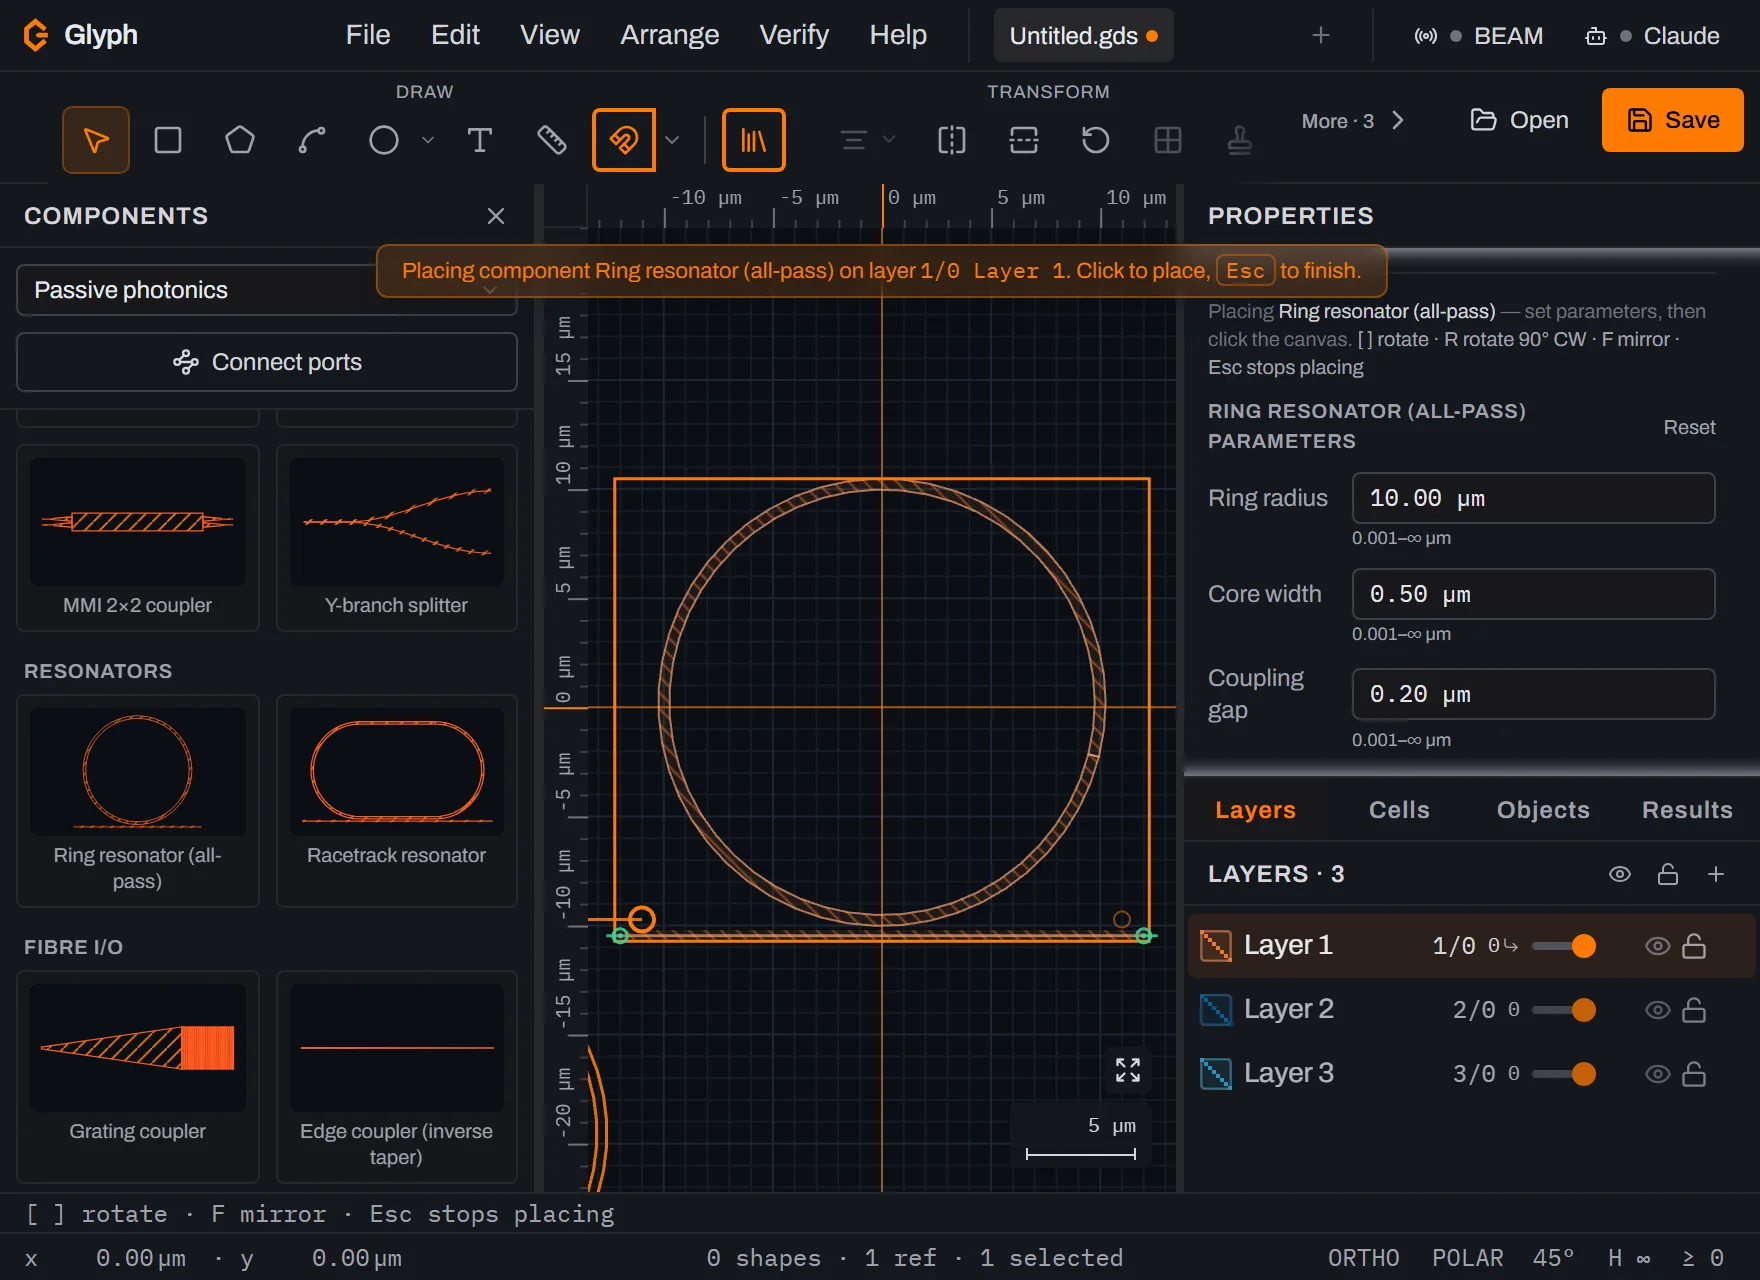
- Open the Components panel and set its library dropdown to Passive photonics.
- Click the "Ring resonator (all-pass)" card in the Resonators category. This arms it for placement — a ghost follows your cursor on the canvas.
- Set the parameters in the Properties panel:
Ring radius(default 10 µm),Core width(default 0.5 µm), andCoupling gap(default 0.2 µm). The gap is measured edge-to-edge between the ring's outer wall and the bus waveguide, not centreline-to-centreline. - Click the canvas to place it. Glyph generates the ring as a keyholed annulus (an outer disk minus an inner disk, via a boolean subtract) and the bus as a straight channel tangent to it below, both on your active layer.
- Zoom in on the coupling region to confirm the gap looks right before you commit to it — a narrower gap couples more strongly (stronger, lossier resonance) than a wider one; this is a layout distance only, Glyph does not simulate optical response.
- Route the bus into the rest of your circuit. The component exposes two ports,
o1ando2, at the bus ends — use the Connect ports button (in the same library panel, or ) to click one port and then another on a neighbouring waveguide, and it routes and stays attached if either moves. The route is drawn on the layer of the component you start from, whichever layer is active; if the two components sit on different layers, a warning says so. - Need more coupling length? Swap in the "Racetrack resonator" card instead — same radius/gap parameters plus a
Straight lengthfor an extended straight coupling section, for a stronger or more tunable coupling than a bare circle allows.
What you built
A ring resonator: an annular waveguide plus its coupled bus, generated as one component with an explicit coupling-gap parameter, with ports ready to route into a larger photonic circuit.
Next steps
Before you route more waveguides through it, check which layer the ring landed on and how it's coloured against the rest of your mask — see Layers. To reshape or move pieces of it after placement, see Modify shapes. For where a finished photonic layout goes next, read NANYTE's maskless lithography overview, or open the editor and place a ring yourself.