Convert an image to GDSII
Glyph can import a PNG or JPG as a reference bitmap, then trace its shapes into real polygons on a GDS layer. The bitmap itself never lands in the exported file — only the traced polygons do — so tracing is how a scanned mask, a screenshot, or hand-drawn art becomes fab-ready geometry.
- Time: ~8 min
- You'll need: a PNG, JPG, WEBP, BMP, or GIF image of the layout you want to reproduce, and Glyph open in a desktop browser.
Why trace an image into a layout?
GDSII has no raster primitive — every shape a mask writer can expose is a polygon, path, or reference. When your starting point is a photo of an existing die, a scanned drawing, or artwork from another tool that only exports images, tracing is the bridge: Glyph binarises or contours the pixels and turns the result into linear polygons you can edit, snap, boolean, and export like anything else you drew by hand.
Import your image
- Bring the image into Glyph. Drag the file straight onto the Glyph window (a "Drop to open" overlay confirms it's accepted), or use and pick the image instead of a
.gds. - Set the scale. The import dialog asks for µm per pixel — pick a preset (0.1 / 0.5 / 1 / 5 / 10 µm/px) or type an exact value based on a known feature size in the source image. This scale is what turns pixel dimensions into real-world nanometres.
- Confirm the drop position. The bitmap lands centered on the current viewport, on the active layer. It behaves like any other shape — select, move, rotate, scale, or mirror it with the Properties panel — but it's a tracing aid, not geometry.
Trace it to polygons
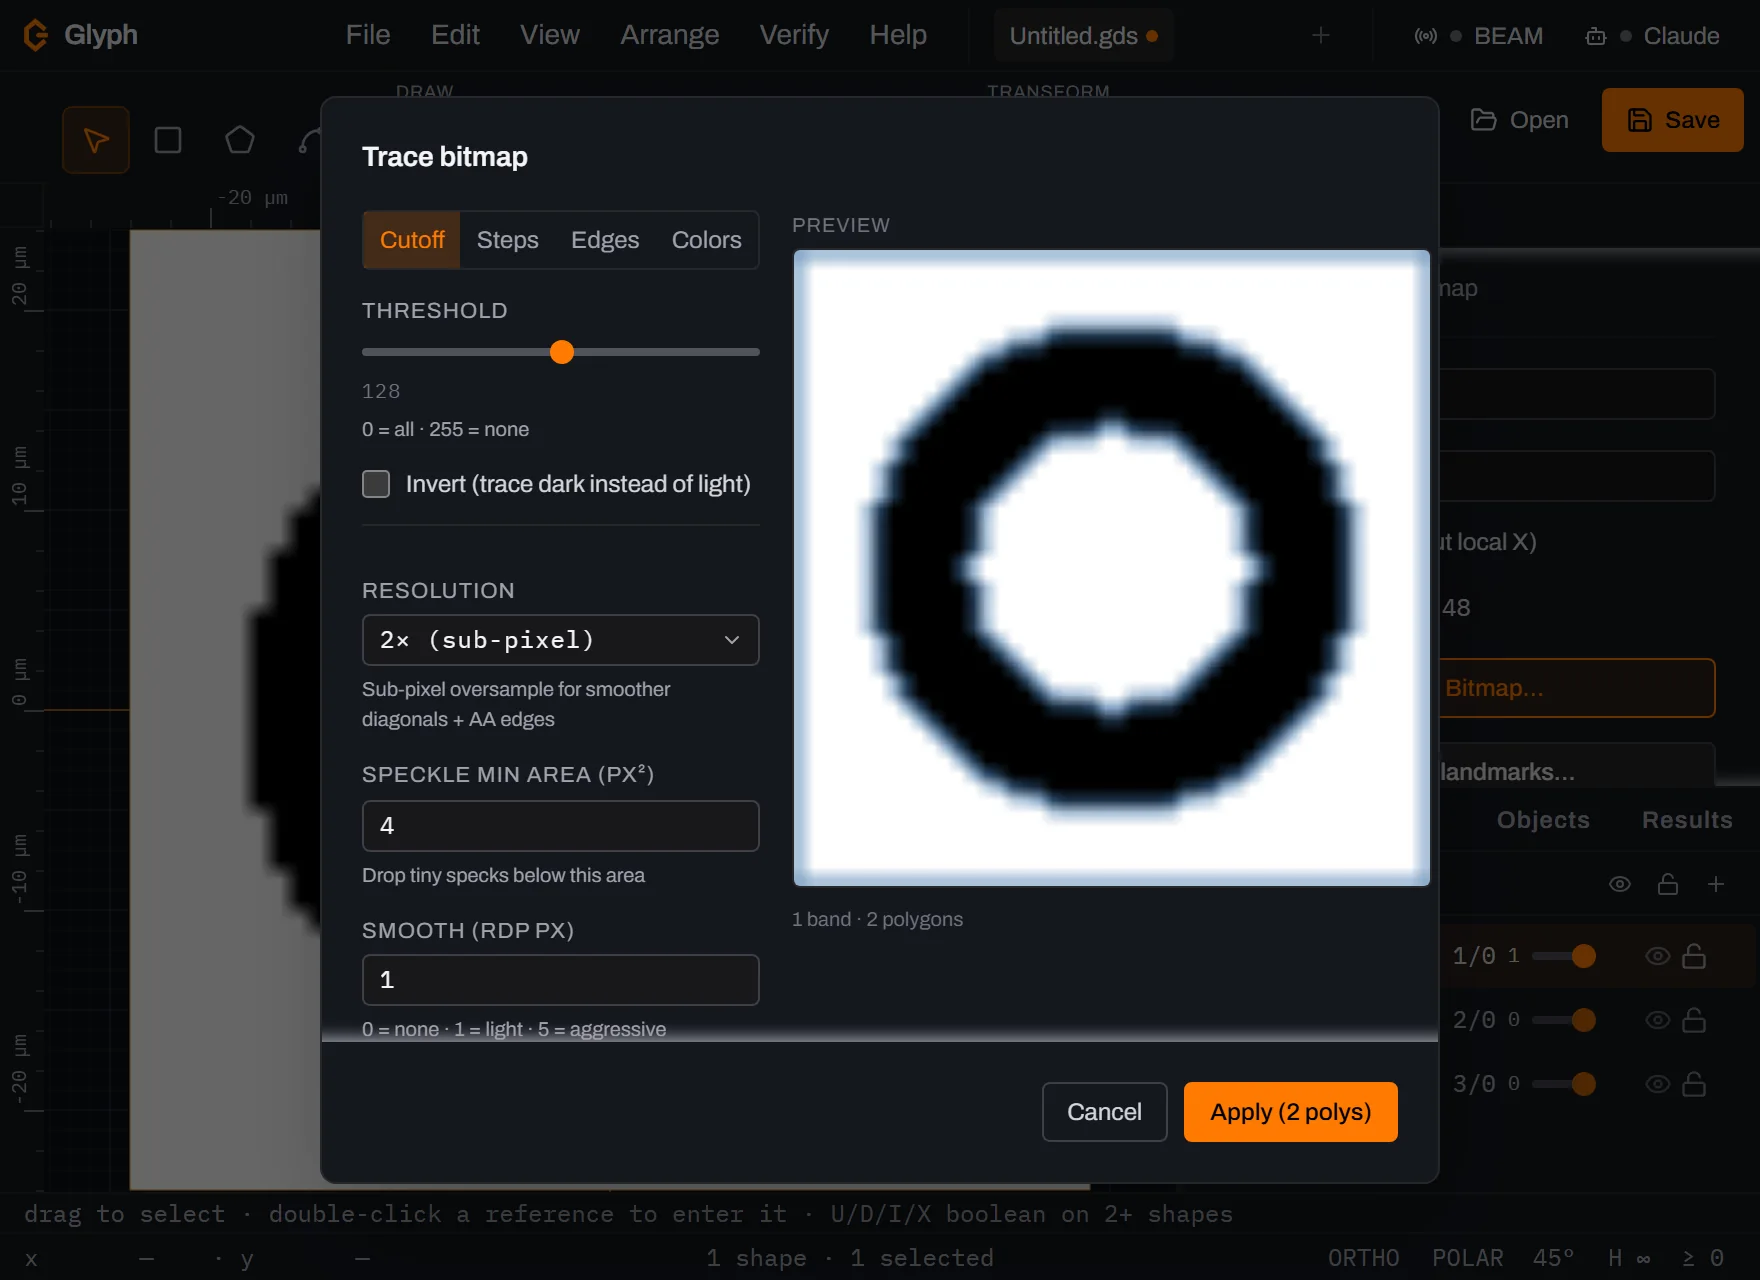 View full image
- Select the bitmap, then open .
- Pick a mode:
- Cutoff — one luminance threshold; pixels darker (or lighter, with Invert) become filled polygons. Best for clean black-on-white art.
- Steps — N gray bands, each becoming a closed contour. Good for posterized or topo-style images.
- Edges — a marching-squares contour on the image gradient, for line art where outlines matter more than fill.
- Colors — median-cut clustering into N color bands, each its own polygon set. Use this to recover a multi-layer mask from a colored reference image.
- Tune the shared knobs in the live preview: min area (drops speckle islands), RDP tolerance (fewer vertices vs. more faithful edges), oversample (smoother diagonals), and snap-to-grid. For Steps/Colors, toggle per-band layers if you want each band auto-split onto its own layer.
- Click Apply. The traced polygons are added to the active cell as a new selection; the source bitmap is left in place so you can re-trace with different settings if the first pass isn't right.
Clean up and export
The bitmap you imported is excluded from .gds export — it's reference-only and never survives a real save. The polygons produced by Apply are ordinary shapes, so once you're happy with the trace, delete the bitmap (select it, press Delete) and save normally with , choosing the .gds extension. Only the traced geometry goes into the file.
What you built
A raster reference image converted into real, editable GDSII polygons — placed on the layer(s) you chose, cleaned of the source bitmap, and ready to export as a standard .gds file that any downstream tool can open.
Next steps
Traced geometry is layout the same as anything hand-drawn, so it flows into the same downstream process as every other Glyph design. See NANYTE's maskless lithography overview for how a traced layout like this one gets exposed. For the full reference on trace modes and knobs, read Bitmap import and Trace; for saving and export formats beyond .gds, see Open and save GDS files; or jump straight into the editor and try it on your own image.