Layers
Every shape lives on a numbered GDS layer. The Layers panel shows one row per layer:
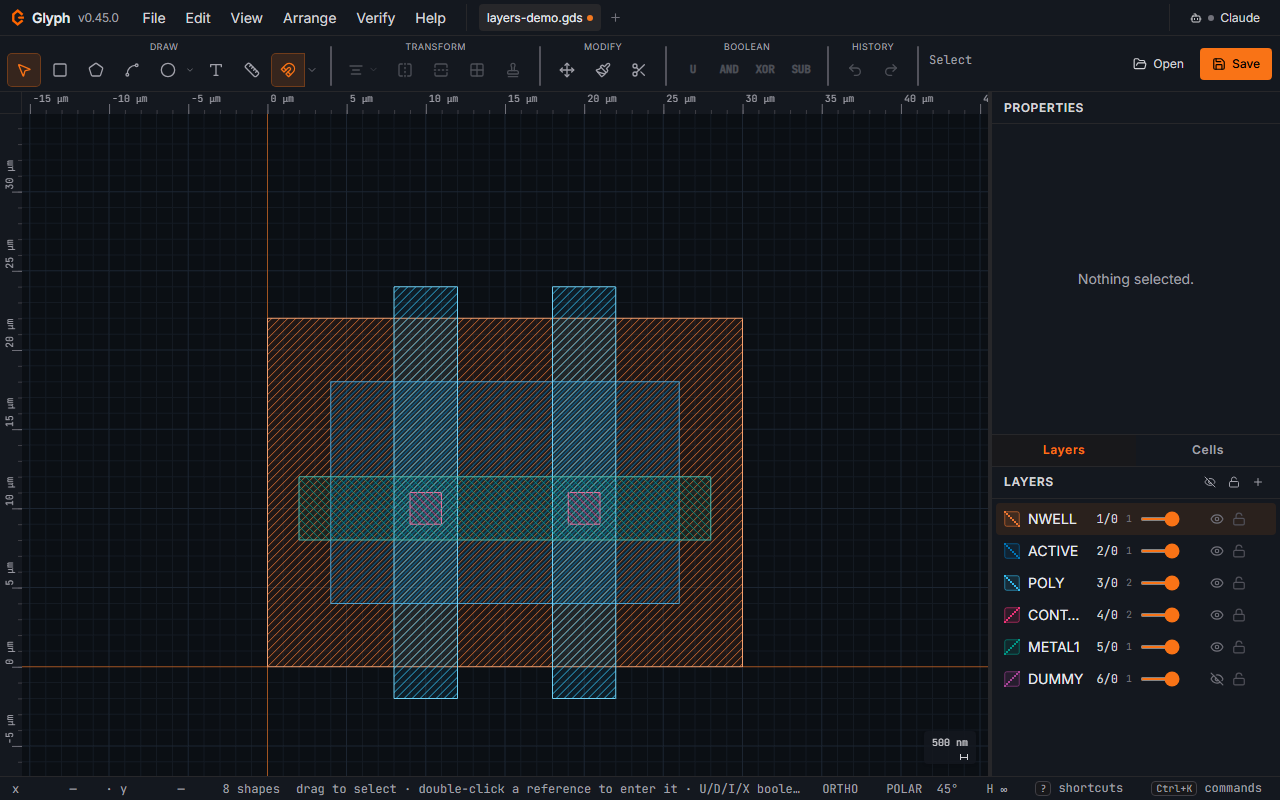 View full image
- Color chip — click to edit color, fill pattern, and mask field tone (see below).
- Eye — toggles visibility. Hidden layers are not selectable.
- Lock — prevents editing shapes on that layer.
- Highlighted row — the active layer. Click a row to make it active; new shapes go there, inheriting its datatype. The
+button makes the layer it adds active. - Drag a row to reorder z-priority — drop it at any position in the list (one undo step).
- Name — editable inline (double-click to rename — the old name starts selected, so typing replaces it —
Enterto commit,Escapeto cancel). id/datatypebadge — the layer's GDS number and datatype. Double-click to retag (typeNto change just the layer number, orN/Mto set both); new shapes drawn on this layer inherit whichever pair you land on. A single click here just activates the row, the same as clicking anywhere else on it — the badge sits at the row's own horizontal centre at the panel's default width, so a plain click there needed to stop hijacking a click aimed at "the middle of the row" (c111). Enter/Space on the focused badge also opens it. Retagging migrates every shape already on the old pair onto the new one, across every cell in the document — not just a rename of the row. It refuses a pair that collides with another declared row, and if the target pair already holds shapes of its own it asks to merge first, naming both counts. The whole move (row, migrated shapes, and the active-layer pointer if it was the retagged row) is one undo step.- Deleting a layer row cascades. The delete button removes the row and every shape on that exact layer/datatype pair, across every cell — as the confirm says. A single
Undorestores the row, the shapes, and their original stacking order. - Tone badge (
DF/CF) — shown when the layer declares a mask field tone:DF(dark field, filled badge) = drawn shapes become chrome;CF(clear field, outlined badge) = drawn shapes become the openings. Set it in the Layer colours & field tone dialog (click the colour chip). This is app-level metadata that travels with the layer-setup JSON and the document — it records the single most consequential per-mask decision without changing geometry. - Preview as exposed (the half-filled circle beside the tone badge, shown only once a tone is set) — shows that one layer the way the mask will look: a dark-field layer paints the mask blank in the layer's colour with your shapes cut out of it as openings. Every other layer is hidden while it is on, and a bar above the list sets the blank's size and margin and has Exit; it is a preview only — geometry and exports are unchanged. Placed cells are not expanded, so a layer whose geometry all sits inside a placed symbol (a typical CleWin file) previews empty — when a cell placed directly in this one holds the layer, the bar offers Preview inside
<cell>, which enters that cell so its geometry shows. - Shape count — the small number to the right of the
id/datatypebadge is how many shapes are on this layer in the active cell. Layers with zero shapes appear dimmed (KLayout-style "used vs unused" hint), so you can tell at a glance which layers carry geometry without expanding everything. A0followed by a small ↳ arrow means the active cell holds none of this layer's shapes but other cells do (e.g. a top cell that only places a symbol); hover the number to see how many ("0 in the active cell · 12 in other cells" — each cell's own shapes, counted once, not multiplied by how often the cell is placed). - Hollow toggle (○ / ◌, hover-revealed) — switches the layer between solid fill and outline-only rendering. Useful when many layers overlap and you want to see edges through one another.
- Opacity slider (hover-revealed, 0–100% in 5% steps) — multiplies the fill alpha for that layer. The stroke is left alone, so even at 0% opacity the layer is still distinguishable by its outline.
Use the + button at the top of the panel to add a new layer.
Once a document holds 8 or more layer rows (or as soon as you type into it) a filter box
appears in the panel header beside the layer count — type part of a name, a bare layer number, or
a layer/datatype pair like 3/0 or 3/ to narrow which rows are shown; the header then reads
"N of TOTAL", clearing the box (Escape or the ✕) restores every row in its original order, and
the header's show-all/hide-all and lock-all/unlock-all buttons act only on the rows currently
matching the filter. It only changes what is rendered — never .gds layer order, never the
document — so it costs no undo step.
Clicking a layer row to make it active, and clicking its eye (including the panel header's
show-all / hide-all button) to hide or show one or every layer, are view changes only: they cost
no undo step and do not mark the file as having unsaved changes — Ctrl+Z still undoes your last
real edit, not the click.