Bitmap import & Trace
Glyph treats raster images as reference / tracing aids — they render on the canvas but are excluded from .gds export. Use them to import a photo, scan, or screenshot of an existing layout and trace it into real polygons.
 View full image
Import a bitmap
Three equivalent ways:
- Drag-and-drop a
.png/.jpg/.webp/.bmp/.gifdirectly onto the Glyph window. A "Drop to open" overlay confirms the file is accepted. - and pick an image file instead of a
.gds. - Programmatically via the Claude/MCP bridge (see Connecting Claude).
The import dialog shows a thumbnail and asks for the µm per pixel scale (with 0.1 / 0.5 / 1 / 5 / 10 µm/px presets). Very large images are auto-downsampled to a sane maximum before import — the dialog says so when this happens.
The imported bitmap is placed centered on the current viewport on the active layer. Bitmaps select, move, rotate, scale, and mirror like any other shape; the Properties panel exposes umPerPx, rotation, and reflect. Bitmaps participate in snap / measure / hit-tests so they're a usable tracing target — they just don't survive a real .gds save.
Align by landmarks (Properties panel, with a bitmap selected)
Typing umPerPx by hand at import time only works when you already know the exact scale. A scanned or screenshotted reference usually doesn't — so the Properties panel's Align by landmarks… button solves scale, rotation, and position for you instead, from two reference points rather than one typed number:
- Click Align by landmarks…, then click a landmark point on the bitmap image itself (Glyph tells you if the click misses the image).
- Click the matching real-world location for that same landmark — an ordinary, OSNAP-augmented click.
- Repeat for a second, distinct landmark pair (four clicks total).
Esccancels at any point.
From the two (image point, world point) pairs Glyph solves the exact translate + rotate + uniform-scale transform that maps one onto the other, and writes the result straight into the bitmap's origin, umPerPx, and rotation — one undo step.
- It's a pure two-point similarity solve — 4 degrees of freedom for 4 equations — so it can never introduce shear, and it never touches the Mirrored checkbox: with only two points a reflection is indistinguishable from some rotation, so telling them apart needs a third, non-collinear point this flow doesn't ask for. Set Mirrored first if the image needs it.
- The two image landmarks (or the two world landmarks) can't coincide — Glyph refuses with the reason stated rather than solving a degenerate transform.
The manual µm per pixel field is still there as the fallback for when you already know the scale, or the image has no two distinct features worth clicking.
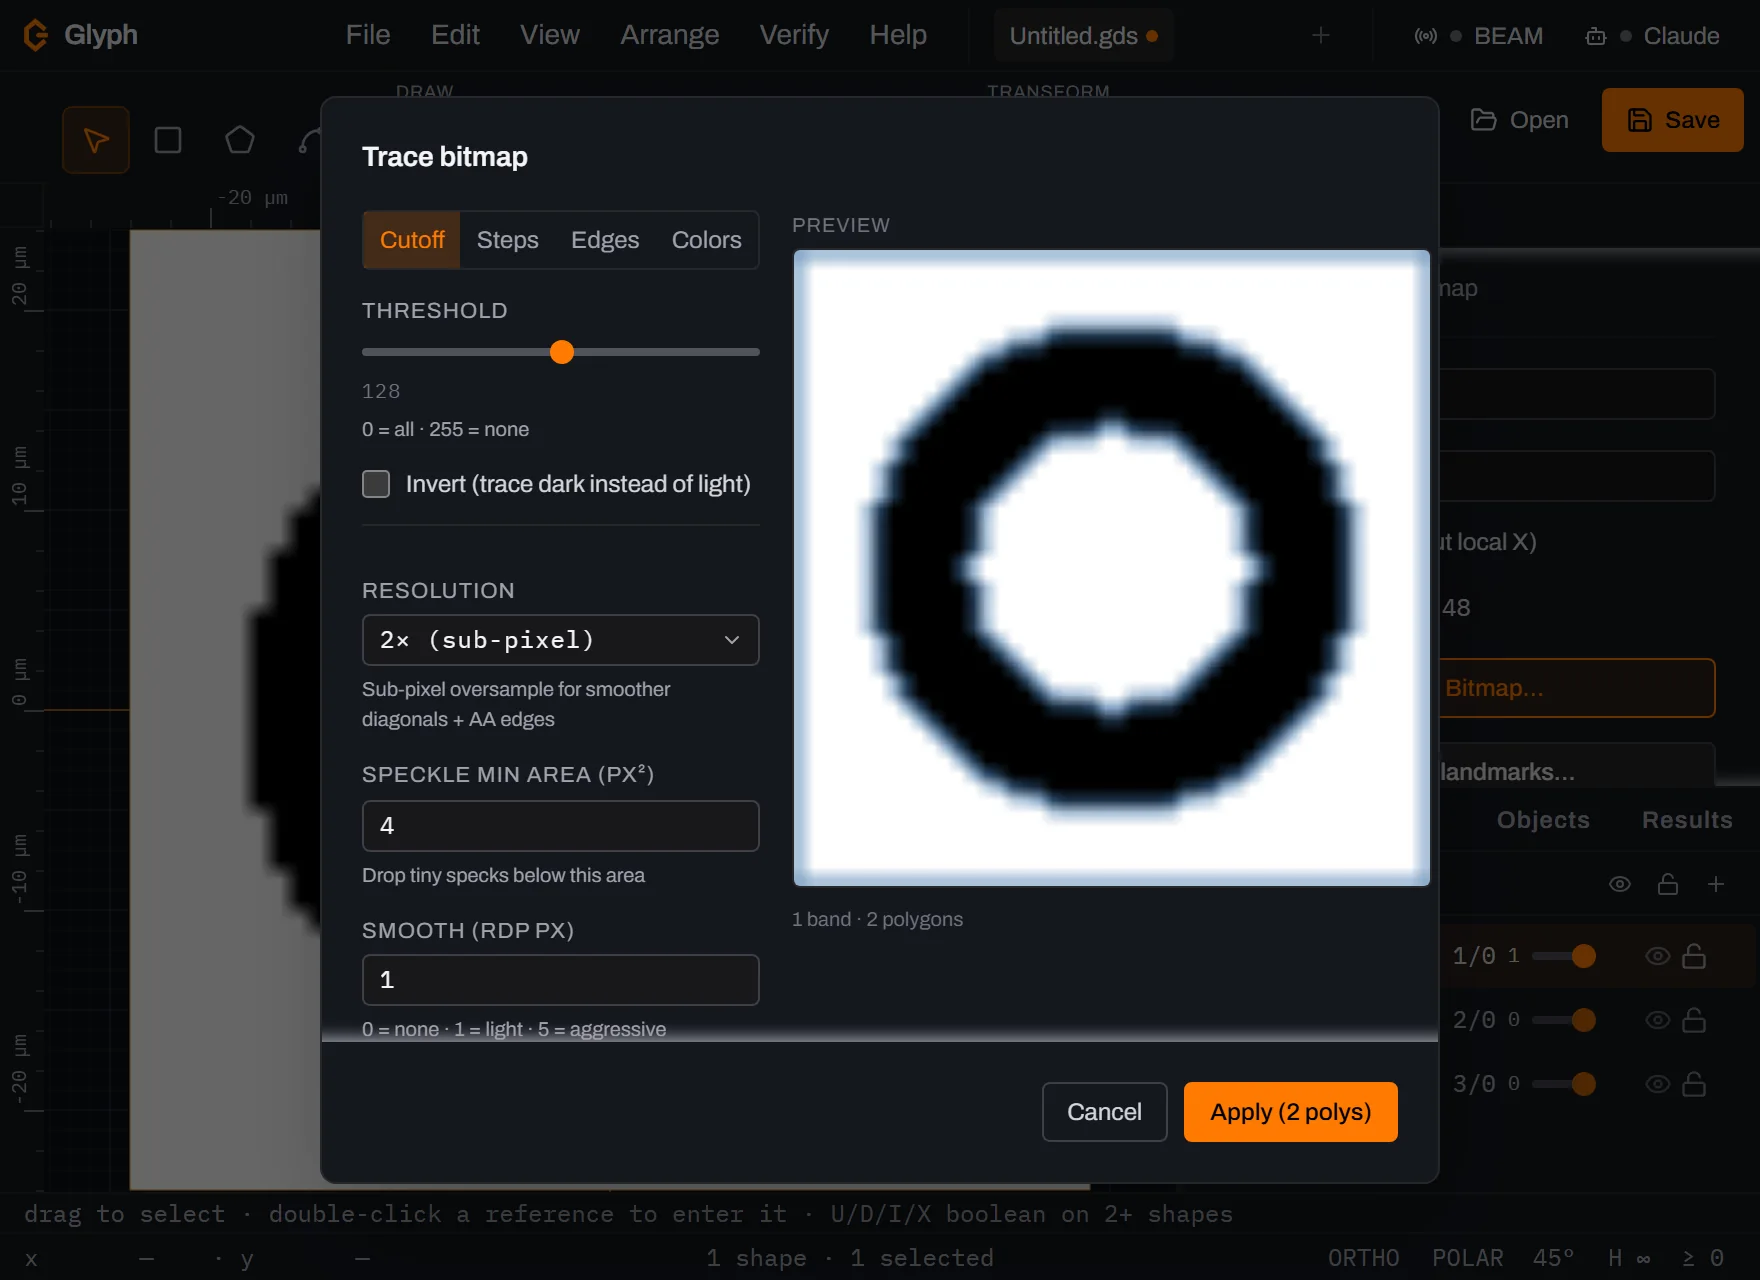
Trace bitmap → polygons (Edit → Trace bitmap…)
Select a single bitmap, then . Four modes:
| Mode | What it produces |
|---|---|
| Cutoff | One band: pixels darker (or lighter, with Invert) than the threshold become filled polygons. Best for clean black-on-white art. |
| Steps | N gray bands (N = "Levels"). Each band is a closed contour at a luminance step. Use for posterized images or topo-style stack-ups. |
| Edges | Marching-squares contour on the image gradient. Good for line art where outlines matter more than fill. |
| Colors | Median-cut clustering into N color bands, each becoming a separate set of polygons. Use to recover a multi-layer mask from a colored reference. |
Shared knobs:
- Min area (px²) — speckle filter; islands below this are dropped.
- RDP tolerance (px) — Ramer–Douglas–Peucker simplification of the contour. Higher = fewer vertices = chunkier edges.
- Oversample — bilinear upsample (1× / 2× / 4×) of the gray buffer before binarising. Higher = smoother diagonals at quadratic cost. (Colors mode ignores this.)
- Snap to grid — round every output vertex to the current grid step.
- Per-band layers (Steps / Colors only) — when on, each band lands on its own auto-created layer. When off, all bands land on the active layer.
The dialog renders a live preview overlay so you can tune knobs before committing. Pressing Apply replaces nothing — the polygons are added to the active cell as a new selection, leaving the source bitmap in place so you can re-trace with different settings. Delete the bitmap manually when you're done.